• Skip to primary navigation
  • Skip to main content
  • Skip to primary sidebar
  • Skip to footer
  • Home
  • About
    • Contact
  • Gardening
    • What to Grow
    • How to Grow
    • Seed Starting
    • Garden Problems
    • Using the Harvest
  • Homesteading
  • Recipes
    • Breakfast
    • Main Dishes
    • Desserts
    • Drinks
    • Fermented Foods
      • Sourdough
    • Preserving
  • DIY
    • How-to
    • Crafts
    • Garden Projects
    • House Projects
    • Herbal Medicine
  • Blog

Meaghan Grows logo

You are here: Home / Blog

Blog

A freshly baked loaf of sourdough sandwich bread on a wooden cutting board. Three slices have been cut and lay in front of the loaf, and to the back you can see the bread knife.

March 24, 2024 Fermented Foods

How to Make Simple Sourdough Sandwich Bread (recipe)

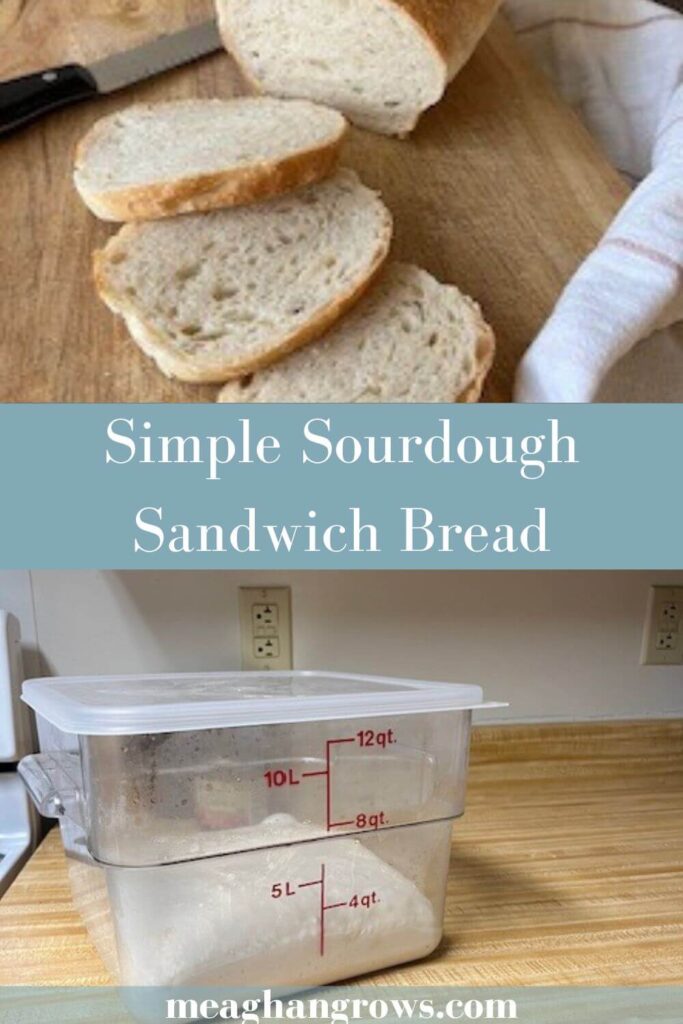
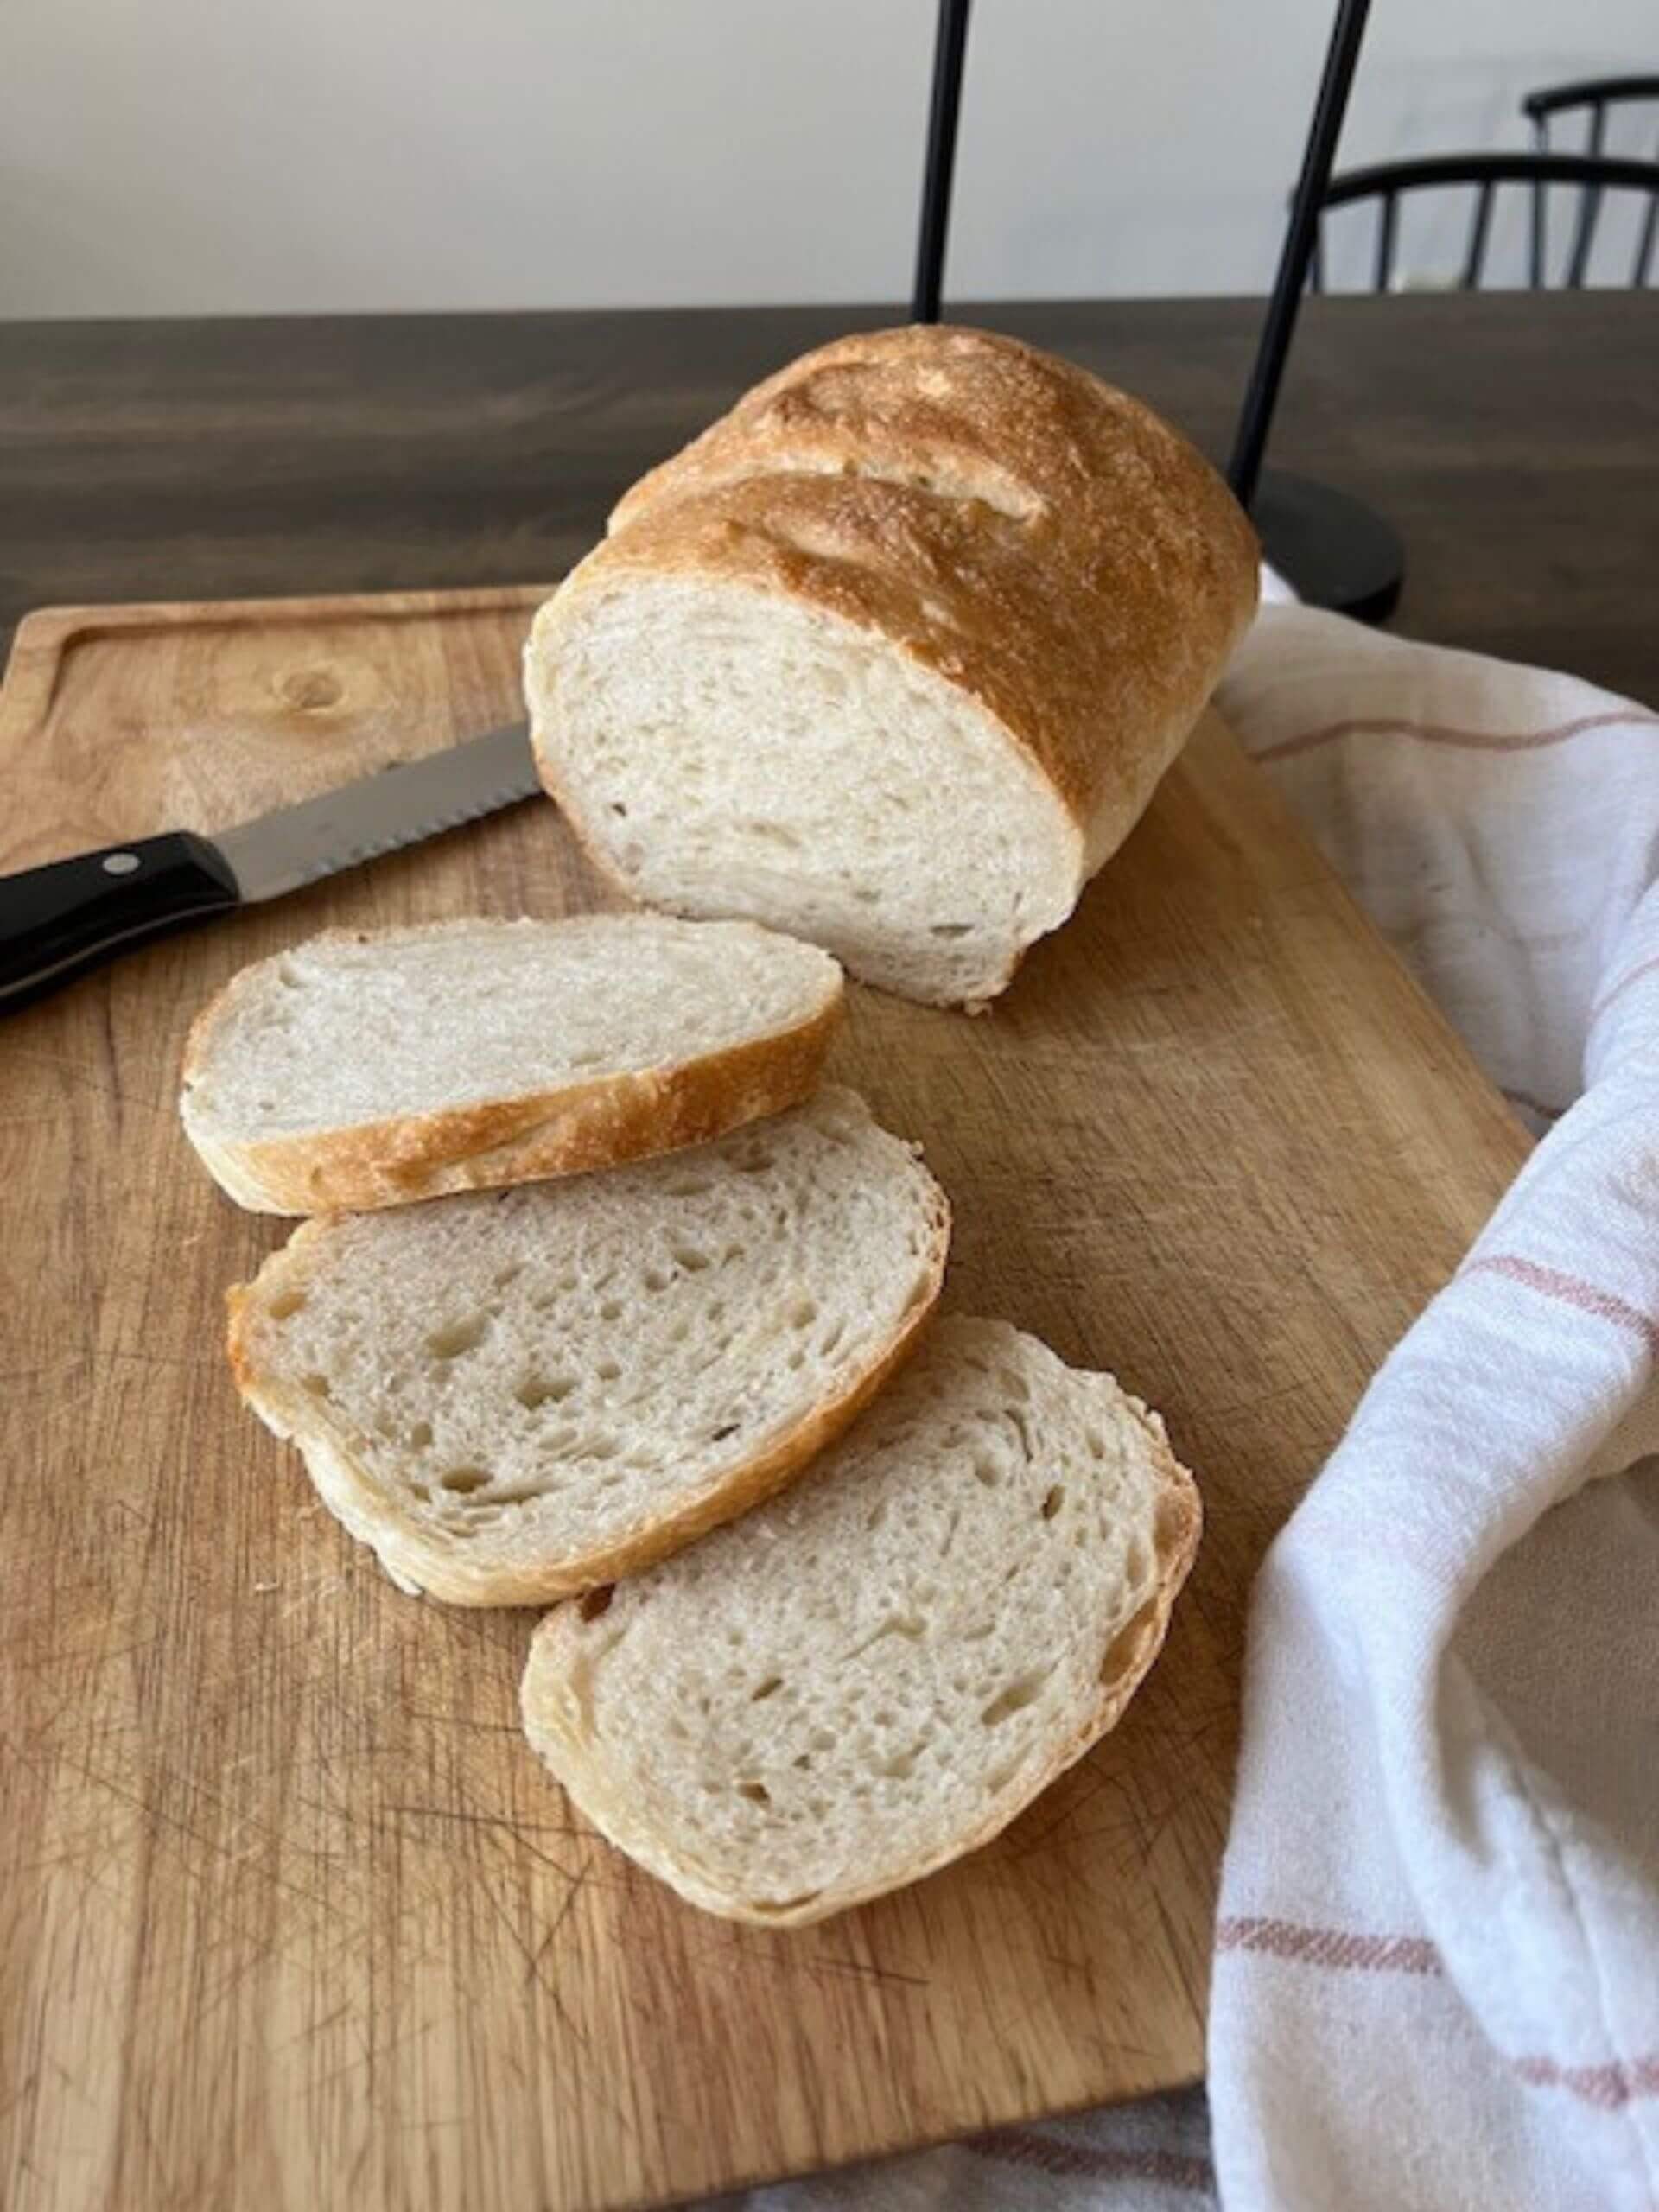
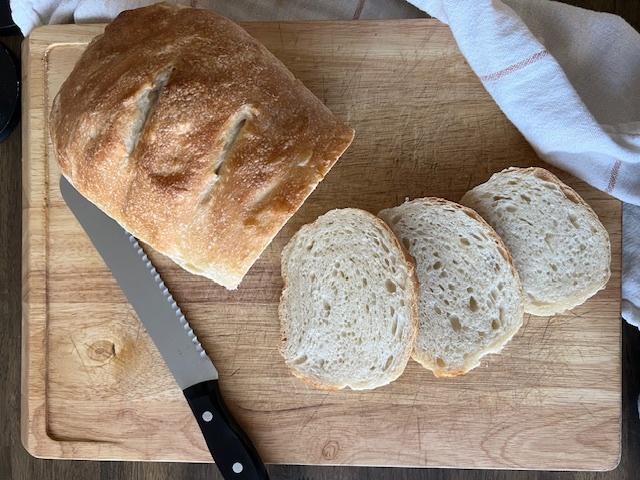
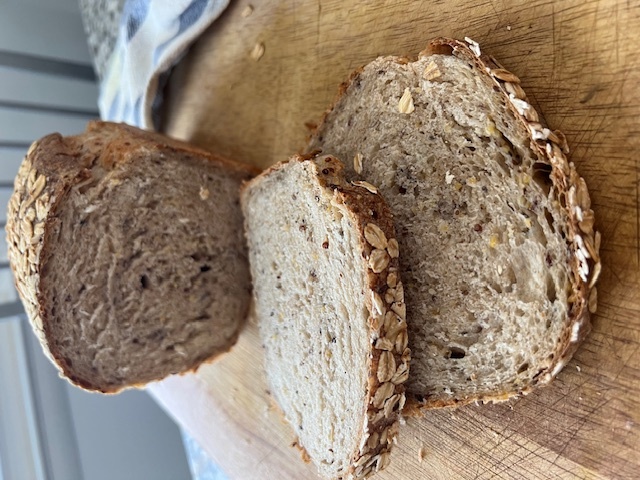
In today’s post, we’re walking through how to make my simple sourdough sandwich bread – literally the recipe I use once a week. It’s a simple intro to some standard sourdough techniques, good for your gut, and so, so delicious!

A freshly baked loaf of sourdough sandwich bread on a wooden cutting board. Three slices have been cut and lay in front of the loaf, and to the back you can see the bread knife.

It takes more time and a little more planning, but I truly believe sourdough bread is easier than yeast bread. This recipe has become a part of my weekly routine, so we never buy bread!

Sourdough sandwich bread is the perfect bread to keep on hand: you can use it in any number of situations. And it’s mild-tasting enough to convert even the most sourdough-skeptic.

I developed this recipe specifically for my family’s sandwich and toast needs. I could do artisan bread all day everyday, but my husband wanted a soft, squishy bread with minimal holes for his daily PB&J toast.

This recipe is so simple and easy – once you make it part of your routine, you’ll never want to go back to store-bought bread.

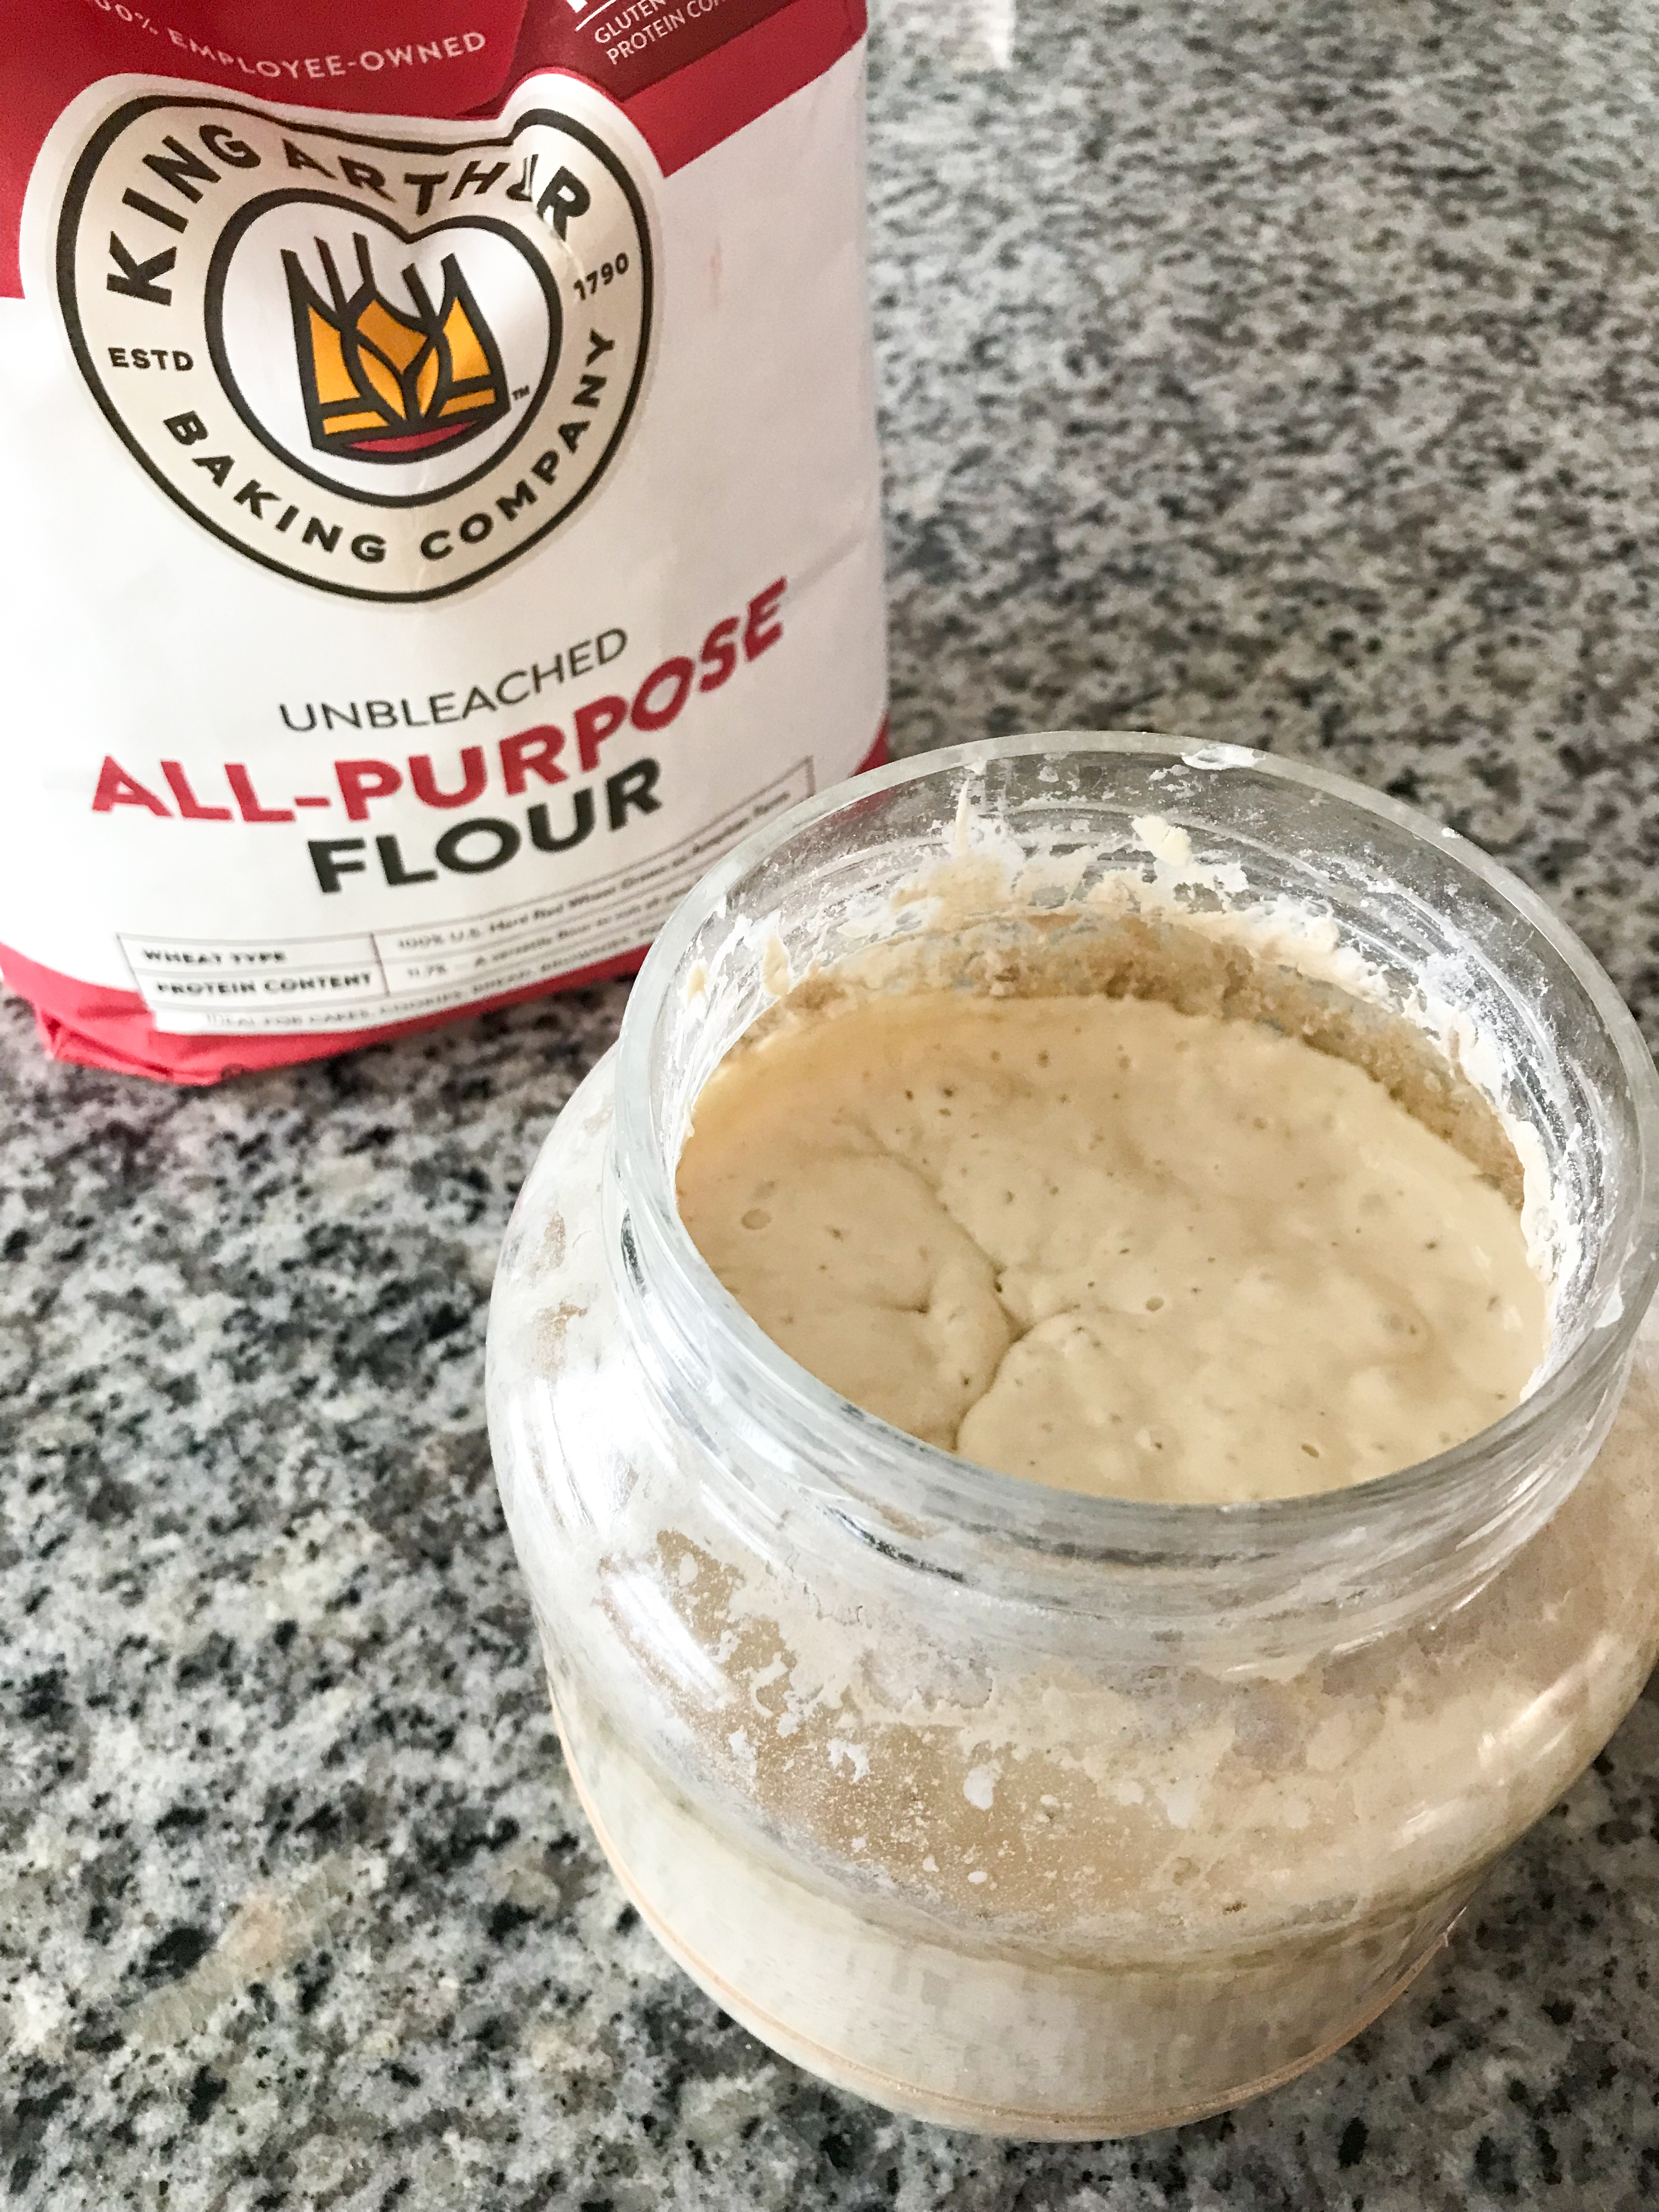
I go through my weekly baking routine below, but sourdough sandwich bread is the my “last” bake of the week on Sundays. I mention that because by then I’ve fed and discarded from my starter a few times so it’s super bubbly and active.

Note that this is the recipe I used with regular, store-bought flour. For a fresh flour, like one you mill yourself or get from a coop like Azure Standard, I use a different recipe that’s higher hydration (i.e., a higher percentage of water to flour) – I’ll share that recipe soon. (Note: if you use my link to place your first Azure Standard order, I get a $25 referral bonus towards my next order.)

Overhead shot of freshly baked sourdough sandwich bread on a wooden cutting board. Three slices from been cut from the loaf and are lying face-up on the board, as is the serrated bread knife.

why sourdough?

It seems like everyone got into sourdough at the beginning of the pandemic. But if it’s still new to you, here’s the rundown:

  • Sourdough is much healthier and more gut-friendly than standard yeast-risen breads. Did you know many people with gluten sensitivities (not celiac) can actually digest sourdough just fine? The slow ferment consumes the gluten and changes the protein structure of the finished bread, making it much easier to digest and the nutrients more bio-available to our bodies. Even if you don’t have a gluten sensitivity, you may find it easier to digest sourdough, especially if you’re prone to bloat or a post-lunch slump.
  • In breads leavened with commercial yeast, even if it’s a super hearty whole-grain bread, phytic acid limits the body’s ability to absorb minerals. The phytates bind to vitamins and minerals, and because your body has a hard time digesting phytates, it can’t get the vitamins and minerals either. The lactic acid in a sourdough starter reduces the bread’s pH, which degrades the phytates so fewer of them can bind to the minerals in the flour.
  • The combination of lactic acid and wild yeasts makes the bread rise; it just takes a lot longer than commercial, or baker’s yeast. Sourdough is how people have made bread for thousands of years – baker’s yeast didn’t become available until the late 19th century. That slow fermentation process also leads to healthier bread on another front – the slower the fermentation, the higher the soluble fiber. High-fiber foods keep you feeling fuller longer and have a lower glycemic index. So no sugar spike and ensuing crash!

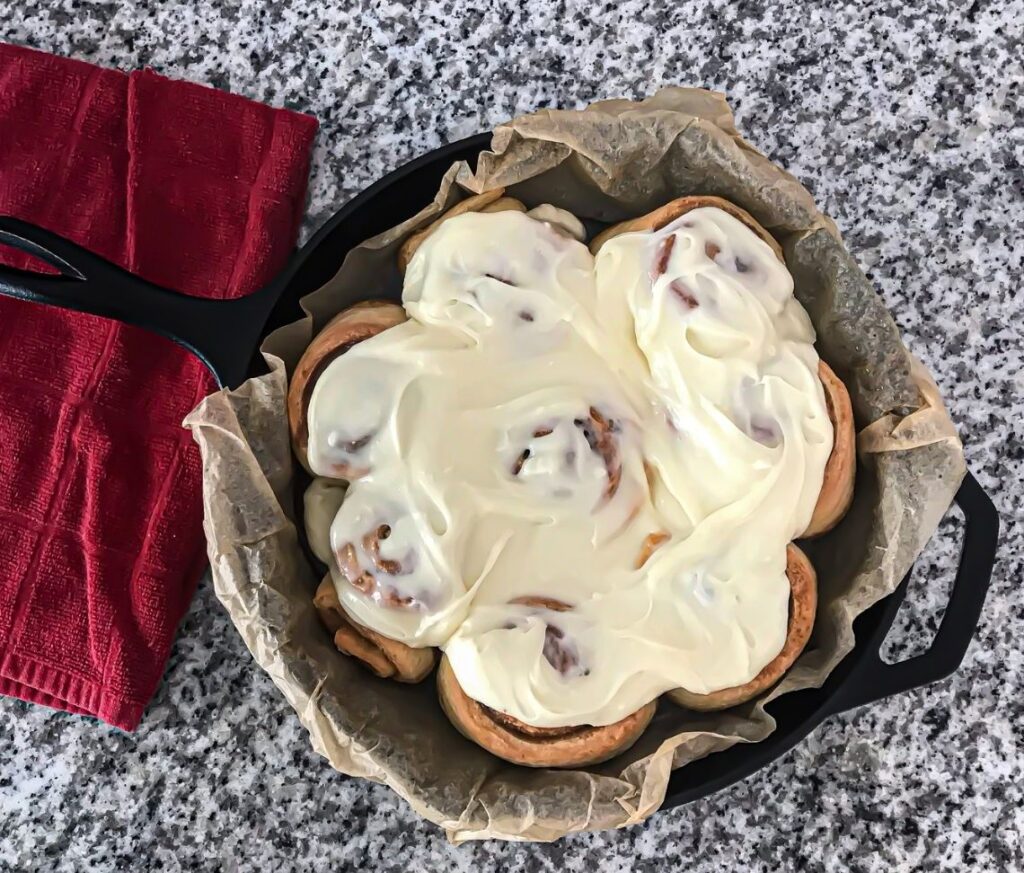
Personally, I also just find sourdoughs much tastier and more interesting than “normal” breads. And as a baker, while they are time-consuming, I find sourdoughs more forgiving. Once you get the basics down, they’re pretty hard to mess up and support any number of fun variations. Check out these make-ahead sourdough cinnamon rolls I developed for my family’s Christmas brunch or the pizza dough we make every weekend!

is sourdough bread good for you?

I’m not going to claim bread on its own is healthy. Naked carbs are still more likely to throw off your blood sugar balance than a carb paired with a protein and a fat. But I’d say it’s probably healthier than the commercial yeast alternative. And it’s definitely healthier than grocery store bread. You have total control over the ingredients, and there’s no weird additives or preservatives.

is sourdough bread sour?

Only if you want it to be! This is true for just about all sourdough baking – it’s only sour if your starter is hungry.

If you’ve ever gone a while without feeding it, you may have noticed a greyish liquid forming on top and a much more sour smell. This liquid is called hooch, and it’s just an alcohol byproduct that indicates your starter has used up all available food. 

If you were to try to bake with your starter in this state, yes it would probably be sour. But a good established starter that’s fed regularly should not be. There might be a slight tanginess that’s not present in commercial breads, but I think that just adds to the complexity of the flavor!

Overhead shot of a glass bowl with the ingredients for sourdough sandwich bread beginning to be combined with a Danish dough whisk. The ingredients are just beginning to reach the shaggy dough stage.

how can I modify/personalize this sourdough sandwich bread recipe?

There’s a number of ways you can tweak this sourdough sandwich bread to suit your family’s tastes. On the more basic level, you can swap out the source of oil or sweetener. Instead of coconut oil, avocado oil is a great choice. I’ve also tried melted butter. Instead of honey, you can use sorghum or maple syrup. I haven’t tried cane sugar but I can’t image the results would be that different.

You can also tweak the flour ratios depending on what your family likes. As written, I call for 350 g of white flour and 150 g of whole wheat flour, but as long as your flour totals 500 g you can change the proportions.

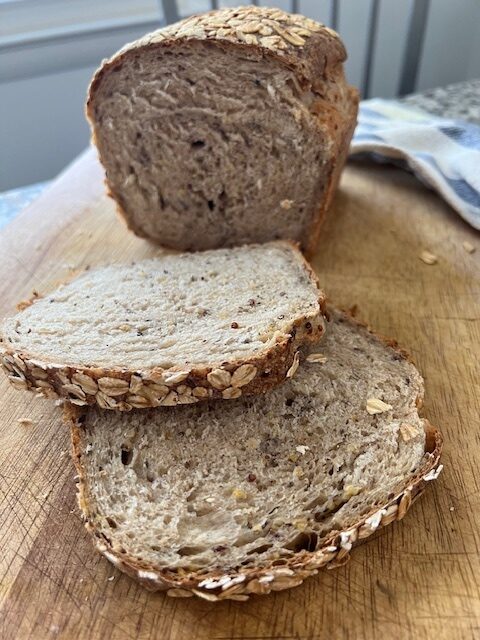
Finally, you can make this sourdough sandwich bread into a multigrain bread by following the instructions for the soaker included below. Add to the heartiness by pressing rolled oats or pepitas/sunflower seeds into the top before baking!

how do i get a sourdough starter?

You can make one! It takes nothing more than flour, water, and wild yeasts you capture out of the air! I’m on my third starter in the last decade (I opted not to bring it with me on moves to and from the US for grad school). But currently starter did survive the 12-hour drive from Ohio to North Carolina just fine.

I don’t have a sourdough starter from scratch guide on this site yet (hopefully coming soon) but there are any number a quick google away.

If you’re impatient, you can also buy some from local or online bakeries. I know King Arthur flour sells it! (This is just information not a recommendation, as I’ve never tried their starter myself. Big fan of the flour though!)

how long does sourdough sandwich bread take to make?

Hands-on time is maybe half an hour, spread out across the first couple hours of the bulk fermentation period. So it’s best if you’re be home to do the stretch and folds (more on that below), but I do the majority of the bulk fermentation time overnight while I’m sleeping. Then in the morning you shape the bread and let it proof in the pan another hour or two before baking. The total time from start to finish is probably around twelve hours, but you can spend most of that sleeping!

A plastic cambro contained sourdough sandwich bread dough after bulk fermentation. The dough looks puffy and risen, and you can see one big bubble.

how long will sourdough sandwich bread last?

On the counter, our loaf lasts most of a week when wrapped in a plastic bag. I bake on Sunday, and then if there’s any substantial amount left the next Saturday I make a French toast casserole for breakfast. Any remaining ends get frozen for future breadcrumbs.

can i freeze sourdough sandwich bread?

Sure, you can freeze it just like you do regular bread. I would wait ’til it’s baked and cooled, and then slice it before freezing.

how do you shape sourdough sandwich bread?

The big thing to know is do not use a rolling pin. Doing so will squish all the lovely yeast bubbles your dough has formed throughout its fermentation. Do some experimenting to see what you like – sometimes I lightly flour the counter, sometimes I sprinkle it with water, sometimes I used avocado oil spray.

After prepping the countertop in the method of your choice, turn out the dough and pat it into the big rectangle. Then fold the two outer thirds in to meet in the middle. Then starting at either the top of bottom, roll the dough in on itself like you’re rolling up cinnamon rolls. Now you can pick it up and plop it in the preferred pan.

what’s the best kind of pan to bake sourdough sandwich bread?

I use a regular metal loaf pan lined with parchment paper. I find the loaf has a tendency to stick without the paper. I’m sure you could use something fancier like a stoneware pan or cast iron or a cloche. But for sandwich bread, I’m trying to keep a softer crust so I keep it simple.

Two shaped but not yet baked loaves of sourdough sandwich bread sitting in loaf pans on the top of the oven.

basic sourdough techniques + terms:

levain

Surprise, this is the French word for leaven, from the verb ‘to rise’ which is lever. Basically, it’s just the fancy term for your sourdough starter. Some recipes will call for a levain step in which you mix a small amount of starter with a small amount of flour and water. You could also just take that full weight amount from your fed starter jar if you have enough.

discard

Because it’s a living thing, you do have to regularly feed your starter by adding flour and water. Now, unless you have some magic, infinitely expanding jar, at some point you’re going to run out of room. It may also not be advisable to keep so much on hand as you should be feeding it in proportion to its size. Honestly, you probably won’t need more than a cup at any point in time.

So discard refers to the portion that you discard before feeding so your jar doesn’t overflow. When feeding, you should aim to replace what you removed. When I feed, if there’s more than ~25g in my jar, I move the excess to a different discard jar. Then I feed ~50 g flour and ~50 g water. I use the discard weekly in Diner-Style Sourdough Buttermilk Pancakes, as well as in things like cornbread, chocolate chip cookies, biscuits, etc.

autolyse

The autolyse is usually one of the first (if not the first) steps in a sourdough recipe. It’s just mixing the flour(s) and water and then allowing it to rest for up to an hour.

You want to do this step because the water activates the enzymes in the flour which begin to break down protein bonds, relaxing the dough. A relaxed dough has higher extensibility, which is its ability to stretch without tearing – something necessary for a good rise. A good dough will have a balance of extensibility and elasticity, or the tendency to resist stretching. Together, they make it so your dough can expand while still trapping the gaseous byproducts of its fermentation, aka it rises without exploding.

pincer method

If you make the multigrain version of this bread, I call for incorporating the soaker using the pincer method.. In it, you use a pinching, or crab claw-like motion, to cut ingredients into the dough. Weirdly, it works better than mixing or stretching. It helps get wet ingredients more evenly distributed.

stretch and fold

This is the standard way to knead sourdough doughs – and is much easier and less work than how you need commercial yeast dough. Basically, using wet hands, get your hand under the dough, pull it up as far as you can without it tearing, and fold it over itself in the bowl. Rotate 45° and repeat until you’ve worked your way around the dough.

bulk fermentation

Bulk fermentation is basically just the dough’s first rise – after you’ve added the starter but before you’ve shaped. This, surprise surprise, is when it ferments. 

proofing

In contrast, proofing is the second rise, after shaping and before baking. In this recipe, it happens the next morning after you shape the dough..

Close-up of the multigrain version of sourdough sandwich bread. Two slices have been cut so you can see the multigrains in the bread as well as the oats pressed on top.

my weekly sourdough routine

Obviously, sourdough takes more time and forethought than commercially yeasted doughs. I tend to do the bulk of the week’s baking over the weekend, so here’s how I approach making sure my starter is ready to go whenever I want to bake:

  • Thursday night: Before bed, I pull the starter out of the fridge and let it wake up on the counter overnight.
  • Friday morning: Discard and feed starter.
  • Friday lunchtime: Make my sourdough pizza crust dough. Feed starter to replenish what went into the dough.
  • Saturday morning: Discard and feed starter.
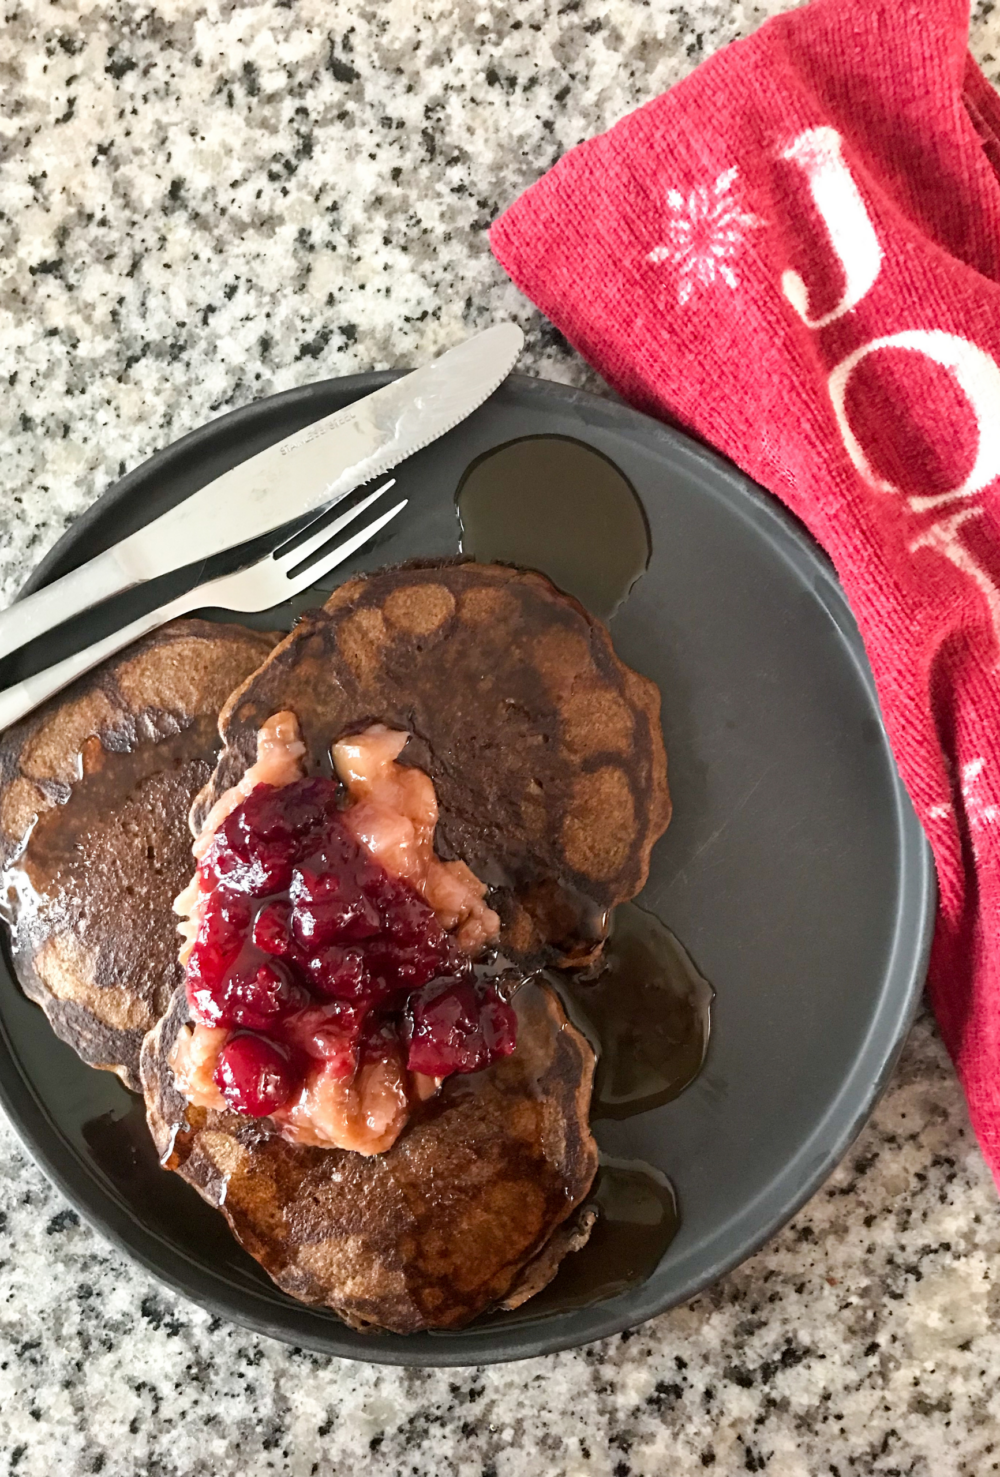
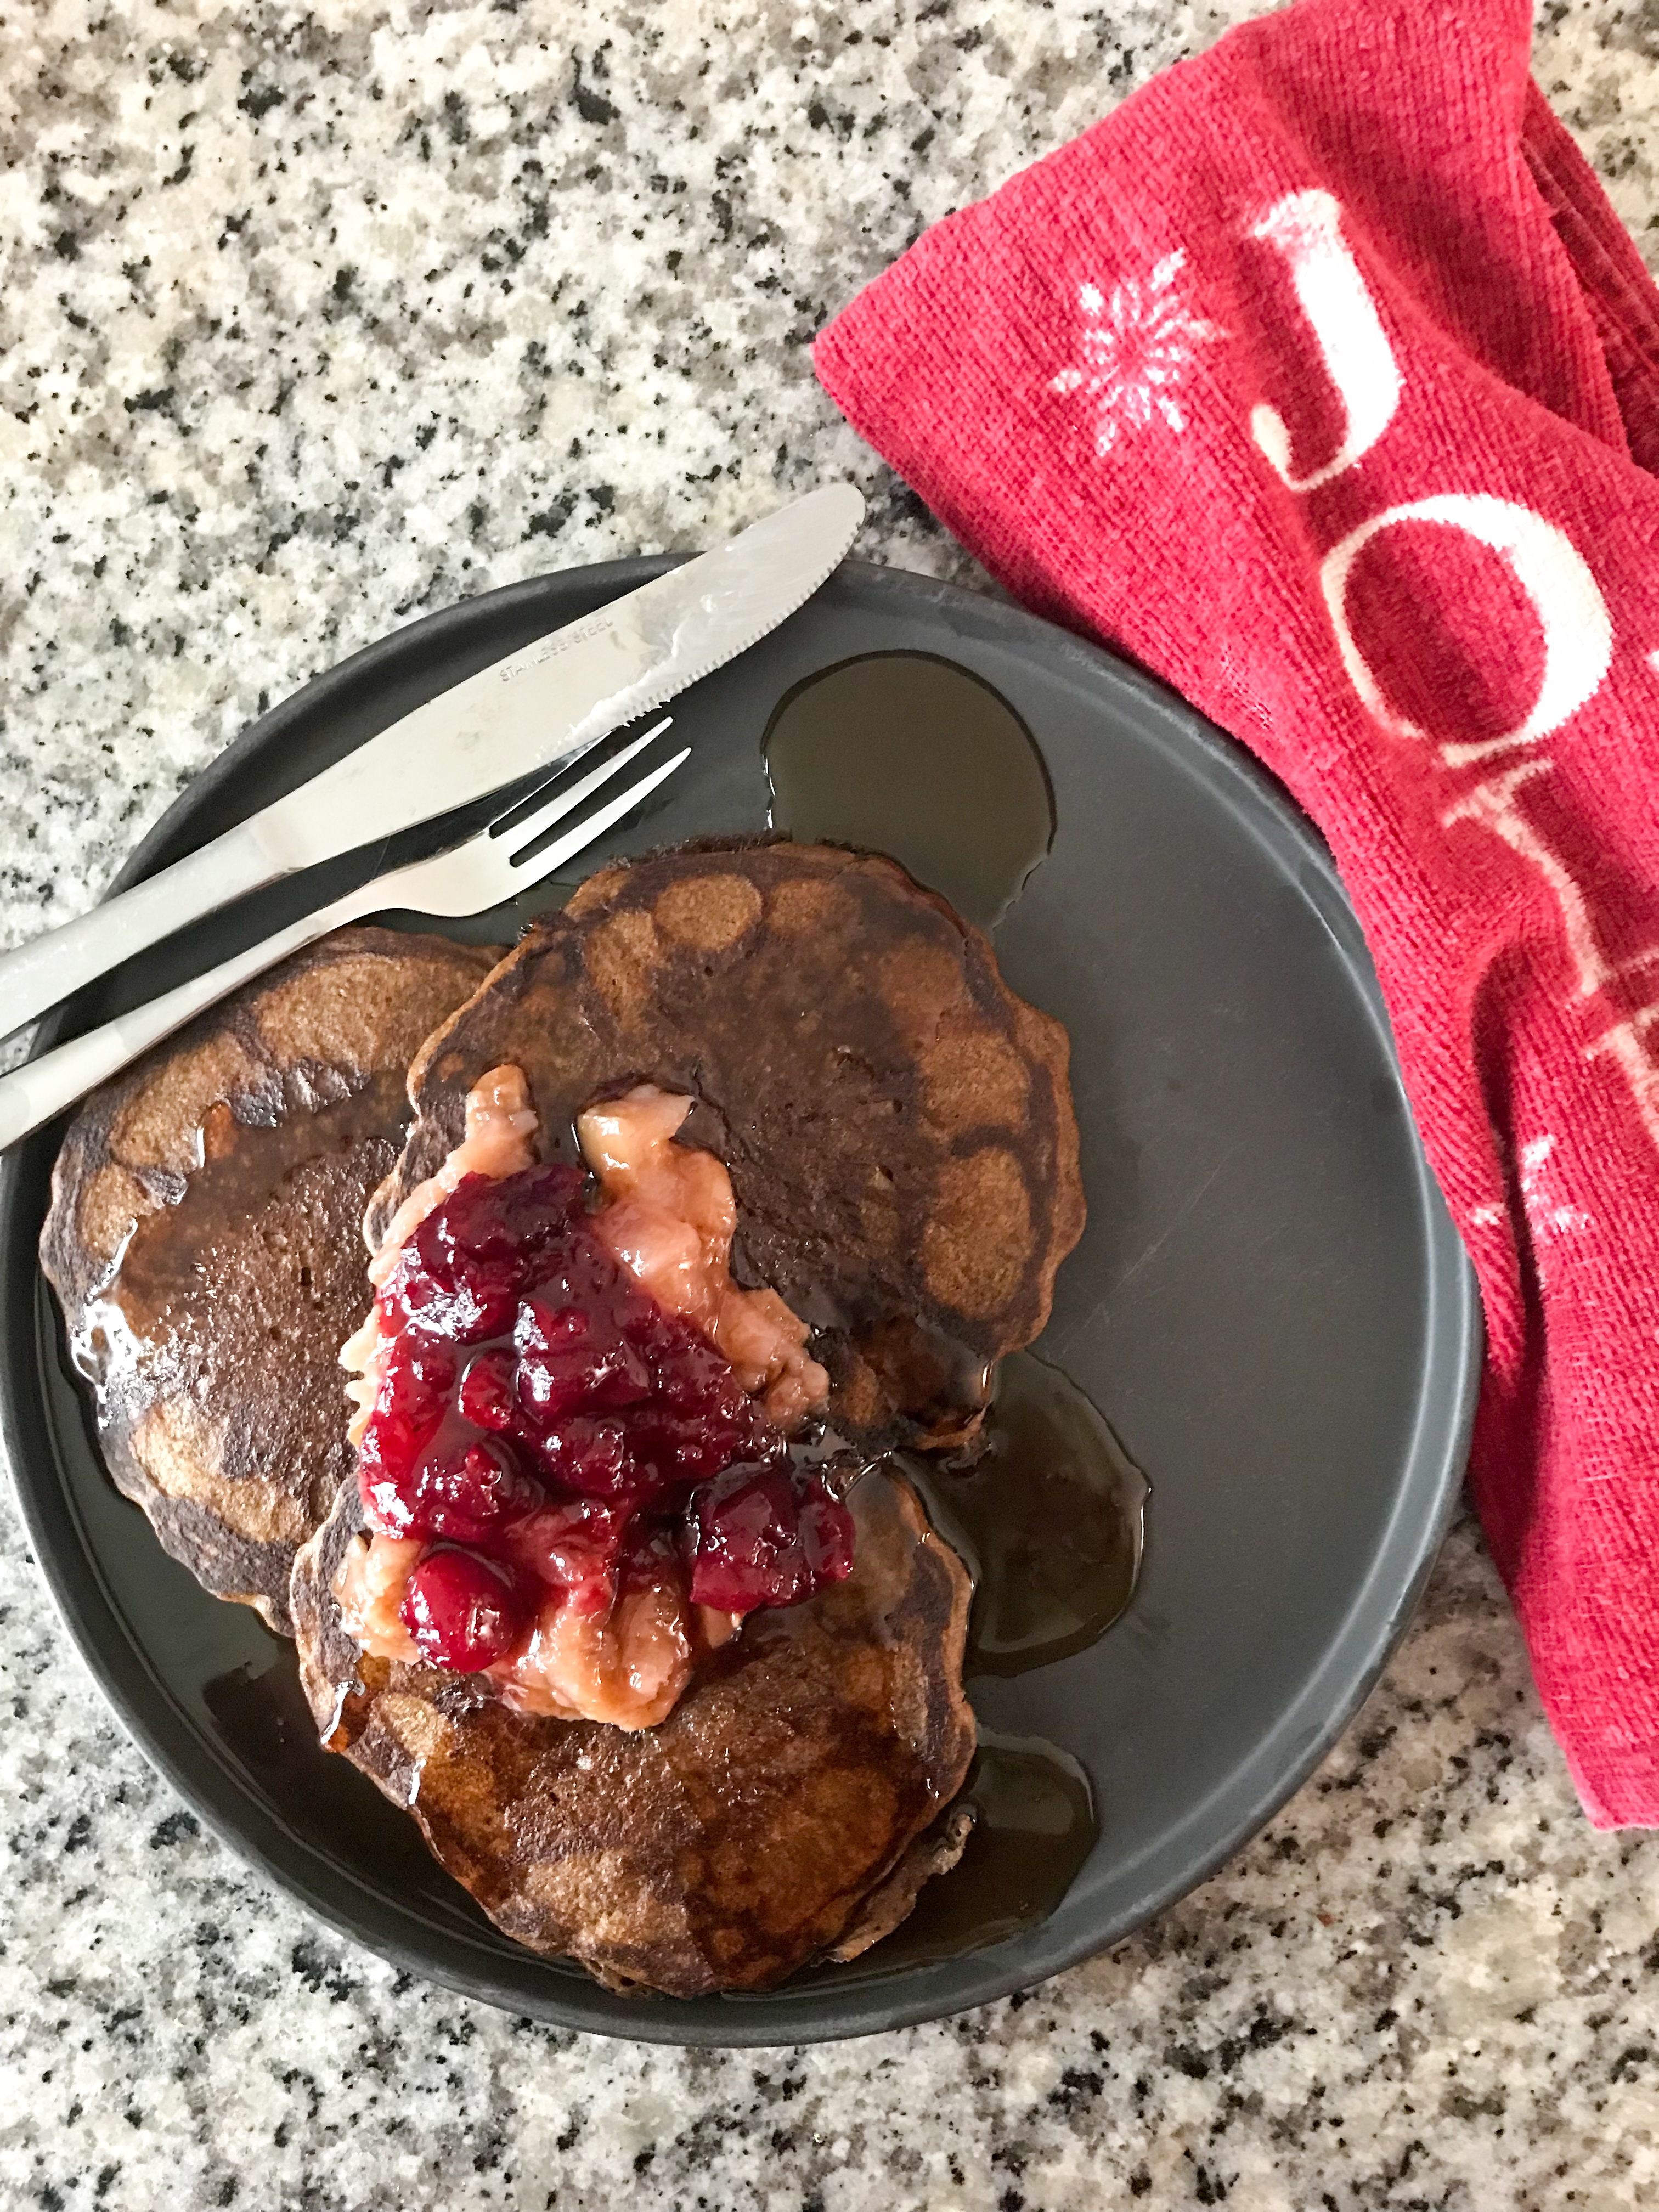
  • Saturday night: Use discard to make sourdough pancake batter (recipe coming soon!). Use active starter to make sourdough sandwich bread dough.
  • Sunday morning: Proof and bake sourdough sandwich bread.

If I don’t need the starter again til next week’s pizza dough, back into the fridge it goes! I use my starter every week, but you don’t actually have to. A healthy starter can live in the fridge a few weeks between feedings!

Another angled short of multigrain sourdough sandwich bread. Two slices have been cut from the loaf, and all lie on a wooden cutting board.
Yield: 1 loaf

Sourdough Sandwich Bread

Close-up of the multigrain version of sourdough sandwich bread. Two slices have been cut so you can see the multigrains in the bread as well as the oats pressed on top.

It takes more time and a little more planning, but I truly believe sourdough bread is easier than yeast bread. This recipe has become a part of my weekly routine, so we never buy bread!

Prep Time 30 minutes
Cook Time 45 minutes
Additional Time 12 hours
Total Time 13 hours 15 minutes

Ingredients

For the dough

  • 50g bubbly, 100% hydration sourdough starter
  • 300g warm filtered water
  • 20g honey
  • 45g melted coconut oil
  • 150g whole wheat flourt
  • 350g bread flour

For the multigrain soaker (optional)

  • 75g multigrain cereal mix (I made my own w/ flax, hemp, chia, polenta, oats and quinoa)
  • ~240g hot water
  • Rolled oats for topping (optional)

Instructions

    1. Prepare the soaker a few hours before baking. I usually use less water than called for, just enough to hydrate, because the chia will absorb liquid. If your mix doesn't have chia, be sure to drain excess water before adding to the dough.

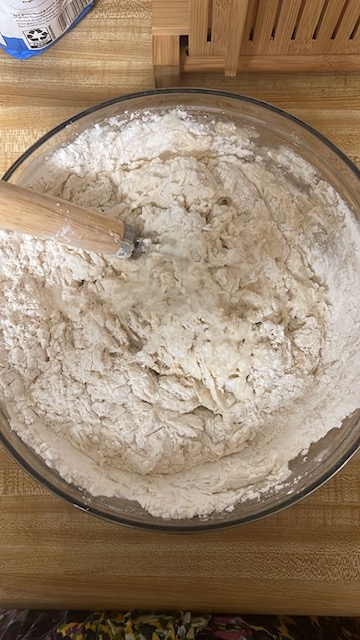
    2. When ready to make the dough, mix the starter with water, honey, and oil in a large bowl. Add flours and salt.

    3. Mix by hand to form a shaggy dough. Cover and let rest for 30 minutes.

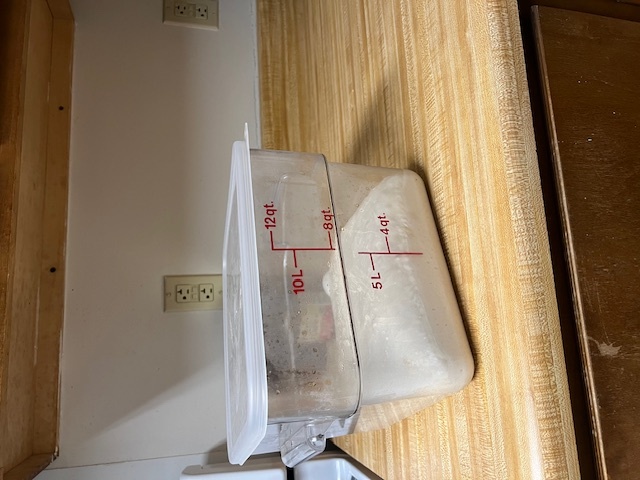
    4. If using, add the multigrains to the dough using the pincer method to incorporate. Then do a round of stretch and folds (as best you can–this is a wet dough; resist the urge to add more flour). This begins bulk fermentation. Cover the bowl and let rise until doubled, about 8-9 hours. (I do this overnight.)

    5. Optional: For the first couple hours of the bulk ferment, you can continue doing stretch and folds every 30 minutes.

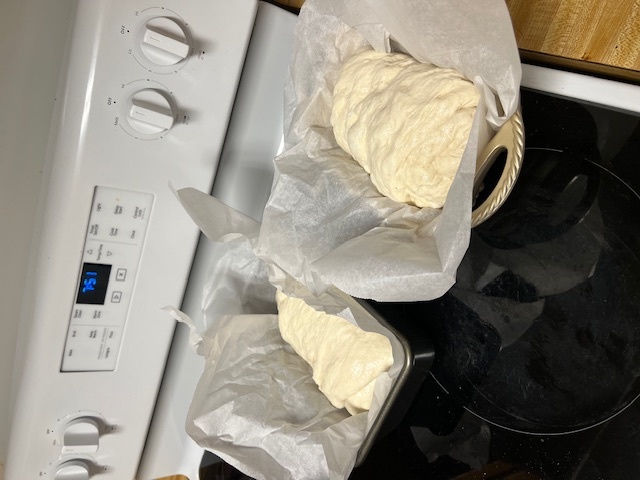
    6. Place the dough onto a surface lightly sprayed with water and press out to a rectangle. Roll into a log and place in an oiled 9x5 loaf pan, seam side down. See more on how to shape above.

    7. Cover loosely and let rest until the dough has crested one inch above the rim of the pan, 1 to 2 hours.

    8. Preheat your oven to 450F for at least an hour before baking the bread.

    9. When it's time to bake, brush the loaf with water and press in some oats. Place the loaf on the center rack, bake for 5 minutes, then reduce the temp to 400F. Bake for 40-50 minutes longer, until it reaches an internal temperature of 190-195F. Cool in the pan for 10 min, then turn it onto a wire rack to cool completely.

© Meaghan
Category: Fermented Foods
Pen drawing of an onion, some lettuce leaves, some peppers, a radish, a tomato, carrots, and a head of broccoli in dark green ink
Pinterest pin reading "Simple Sourdough Sandwich Bread" in white text on a light blue band across the center. On the top is an image of a freshly baked loaf of sourdough sandwich bread, sliced and laying on a cutting board. On the bottom is a cambro containing the dough after bulk fermentation.
A raised wooden garden bed in full summer bloom. Zinnias, nasturtiums, and marigolds spill over the side, and you can see green tomatoes hanging above as well as an eggplant plant. In the background, bunting hangs inside a screened in porch.

March 20, 2024 Gardening

How to Start a Garden in 10 Easy Steps (Gardening 101)

This post, the first in a series on Gardening 101, will walk you through how to start a garden from scratch – perfect for the complete newbie or someone looking to get back to basics and make sure their bases are covered.

A raised wooden garden bed in full summer bloom. Zinnias, nasturtiums, and marigolds spill over the side, and you can see green tomatoes hanging above as well as an eggplant plant. In the background, bunting hangs inside a screened in porch.

Maybe you’ve been thinking about it for a while or maybe it’s a whim that just popped into your head with the soft breezes of spring. Regardless, you know you want to start a garden, you’re just not sure how to start a garden.

And who could blame you? The internet is chock full of (sometimes bad) advice and a million different methods for achieving the same goal: beautiful thriving plants and a chance to connect with nature.

Whether you’re looking to fill your house with beautiful blooms or just offset the weekly grocery budget, read on for 10 simple steps to kickstart your gardening journey and transform your outdoor space into a flourishing oasis.

Step 1: Get Clear on Your Goals and Develop a Plan

Before you can figure out how to start a garden, you first need to figure out what kind of garden you want.

And the best way to do that is to start with your goals and then work backward. 

Maybe you want to be able to pick a homegrown bouquet to keep on your table every week. Maybe you want to grow enough tomatoes to can a year’s worth of sauce or salsa. Or maybe you just want to get your hands in the dirt and have fun and see what happens.

Envision your ideal garden – or at least, what’s ideal given your current circumstances. Do you have pretty good soil and want to dig in-ground beds? Or would raised beds be better? Maybe you’re in an apartment/have no outdoor space beyond a balcony – containers and grow bags are your friend!

Basically, start developing an idea or what you want to grow and how you plan to grow it.

Make sure you consider how much time you’ll have to devote over the next several months. There’s no point in starting out with a ¼-acre garden if you won’t have the time to tend it – and, really, that sounds overwhelming to all but the most seasoned of gardeners.

Then, do some basic research about your local climate so you can figure out when you need to take the next steps. Most people start out with a summer garden. For that, you’ll need to know your last frost date. This is the soonest you can plant tender annuals like tomatoes and peppers (though you should wait a couple weeks beyond that for the nighttime lows to be in the 50s).

Your last frost date is a good finish line to have everything prepped for planting – beds built, soil hauled (if necessary), seedlings hardened off and seeds bought.

Once you have an idea of what you want to do and the timeline for getting started, the next big question is deciding whether you want to grow from seed or purchase seedlings from a local nursery/farmer.

Step 2: Decide How You’ll Acquire Plants (should you start seeds or buy from a nursery?)

Alright, so you have an idea of what plants you want to grow and when you want to plant them, now you have to decide how to acquire said plants.

You really have two choices: grow from seed or purchase already started seedlings. The former is certainly cheaper, but it has a steeper barrier to entry.

Start from Seed:

Pros –

  • Seeds are cheaper than starts
  • You can choose the exact varieties you want to grow
  • Really cool to grow something from seed to fork

Cons –

  • More work/time intensive
  • You have to factor in the cost of acquiring the supplies in the first year (lights, trays, pots or a soil blocker, seed starting mix)

Purchase Seedlings

Pros –

  • Much easier
  • Lower risk of plant failure to thrive/germinate
  • Support local farmers/businesses

Cons –

  • One seedling costs what a whole packet of seeds costs (one plant vs. 10/25/50/etc)
  • Limited in variety (most people will plant what they know will sell, so less opportunity to try weird/niche varieties)
  • Potential demand issues (my favorite local farm in Columbus sells out of seedlings every year)

As you can see, there are pros and cons to both – and you can do both! In my first container garden, I purchased seedlings because I didn’t have the space or the confidence to grow from seed (side note: If you’re in central Ohio, Foraged & Sown grows incredible seedlings!). But now I love growing from seed because it’s really freaking cool and because I get to choose the exact varieties I want to grow. And there are so many things I would never get to taste or experience if I didn’t grow them from seed.

Even if you choose to go with started seedlings from slow growers like tomatoes and eggplants, there are plenty of things for which you can stick a seed straight in the ground and grow, no indoor set-up required. Consider purchasing seed packets for flowers like zinnias, borage, nasturtium, and sunflowers as well as gourds/squash, greens, peas, carrots, radishes etc.!

I wouldn’t suggest planting anything yet – or at least not until you have a clearer picture of just how much growing space you’ll have.

Step 3: Select a Site and Plan Your Beds (or Containers)

So you know what you’re growing, when you need to plant, and whether you’re growing from seed or starts, now you need to get working on the actual physical space!

For some, the decision on where to put the garden is easy – it’s the only space available! My first garden was just containers on my apartment balcony, and while the sun exposure wasn’t ideal, I still managed to grow tomatoes. We make do with what we have and learn skills to use when we hopefully have a more ideal/larger space!

For others, you may have a decent amount of space to pick from. If you have multiple options, you want to evaluate each for which has the best growing conditions. How’s the soil quality? Where does the water pool in your yard (stay away)? Is the site pretty level? And most importantly: how much sunlight does it get? Most garden plants need full sunlight, which means more than six hours of direct sunlight a day.

In the winter, it can be hard to know exactly how much sun a space gets. If you want a better estimate, try out sun mapping! Also watch out for any large trees – it may seem like a sunny space in winter when the trees are bare, but a fully leafed-out 50-year-old oak will cast a lot of shade. Be sure to keep your garden away from Black Walnut trees as these release juglone into the soil, a chemical which kills many garden plants.

If you live in a warm climate, you may try to select a site that does get some afternoon shade to protect your plants from the hottest part of the afternoon.

Once you have your site selected, you can begin to map out beds and container placement. Don’t worry about what will go in them yet, but just get a picture of how much space you’ll have. How many beds? What dimensions? Ditto to containers. If you’re growing in beds, trying to orient them so the short sides face east/west. This will ensure the sun travels over them and minimizes the ability of taller plants to shade out smaller ones.

Go ahead and also get started building beds and prepping the soil at this point.

Freshly built wooden raised garden beds making an L along the sides of a house. A shovel leans against the beds, and a black dog is in shadow in the background.

Step 4: Plan Your Garden Layout

Once you know the dimensions/size of your space, you can begin to lay out your intended plants within them. I plan my garden in google sheets every year – doing it virtually makes it easy to tweak, I can keep my layout and all my seed starting info in the same place, and I can easily reference prior year’s plans. But good old paper and pencil are also great options!

Note that these plans don’t have to be concrete. You can always tweak the layout, but getting an idea of what you want will help you plant seed starting/transplant purchasing as well any sort of trellising or supports you may need.

I don’t have room to fully go into principles for how to lay out a garden in this post, but know that will vary depending on how you’re growing – beds vs. containers, etc. To get you started, research companion planting and interplanting, think about how much space a full-grown plant will take up, and remember that you don’t have to plant in rows!

When you have an idea of your plant layout, you’ll also know how many of each thing you’ll need – key info whether you’re starting seeds or buying transplants!

Step 5: Start Your Seeds or Visit Your Local Nursery

Now begins the really fun part!

If you decided you want to grow from seed, it’s time to make a plan for when and how you want to get started. Utilizing that last frost date you looked up earlier, or a tool like the Farmer’s Almanac Planting Calendar to calculate when you’ll need to sow what seeds. 

Make sure you’ve got your seed starting area set up before you begin. I strongly encourage you to use lights (even cheap shop lights!) rather than putting your seedlings in a window. They just won’t get enough light from a window, no matter how bright. Strong seedlings make strong plants. I’ve never seen window-grown seedlings that weren’t leggy and spindly.

If you’re planning to purchase starts, you’ve probably got a little more time. But you can scope out what your local options are and get an idea of varieties you want. Most nurseries will have at least a few choices within any specific vegetable or flower variety.

Step 6: Harden Off Your Seedlings

This is such an important step so many newbie gardeners miss! 

Plants cannot go from living inside 24/7 to outdoors 24/7 in one shot. Just like most of us after a long winter indoors, they’ll get sunburns and go into shock. The process of slowly acclimating plants to living outdoors is called hardening off.

I like to start hardening off on a cloudy afternoon, putting my plants out at about 4 in the afternoon. If I’m lucky and it’s going to be warm overnight, I’ll leave them there til 9 or 10 the next morning. I bring them back in and put them back under lights, then put them out again one hour earlier than the day before.

Each day, I extend their time outdoors by an hour until eventually they’re thriving even under the most direct midday sun.

The idea is to slowly build up their tolerance to wind and sunlight, which is brighter than even the best grow light.

Most purchased seedlings have already been hardened off, but it doesn’t hurt to ask and double check!

Five trays of thriving seedlings in black trays sitting on a patio table and chairs, waiting to be planted out.

Step 7: Planting Day!

If your seedlings have been properly hardened off and the ten-day forecast looks good, you’re ready to plant! Good thing you already have a layout plan – but, again, feel free to get creative! I revise my garden layout right up until planting day.

A few of my top tips for planting:

  • I love to sprinkle some mycorrhizae in the planting hole of my seedlings. Mycorrhizae are fungi that develop symbiotic relationships with plant roots, helping to deliver nutrients and oxygen to them.
  • I also sprinkle a bit of fertilizer in, either into the planting hole or scratched into the surface when I’m done.
  • Always give plants more space than you think they’ll need.
  • Plant tomatoes deep – tomatoes develop adventitious roots, which means any part of their stem that’s buried will grow roots from it. At this point, you want your plants focused on developing strong root systems.
  • Maximize your space by interplanting quick-growing varieties with slower ones. One of my favorite tricks is to surround seedlings with radish seeds. By the time the seedlings get big enough to need more space, the radishes are ready to harvest!
  • After planting, water everything in thoroughly.
  • Don’t be worried if seedlings look droopy for the first few hours after planting. This process is stressful for them, and some amount of transplant shock is inevitable. They should perk back up in a few hours!
  • Don’t forget sunscreen, especially on your back!
  • Use labels – especially for anything you sowed from seed. It’s tempting to think you’ll remember where everything is, but you won’t. Especially if you’re growing multiple types of a given variety. All pepper plants look the same til they grow fruit.

Congratulations, you’re officially a gardener!

Step 8: Maintenance and Care

At this point, your garden will mostly be in maintenance mode. But that doesn’t mean it’s self-sufficient. At least, probably not without several years of ecosystem-balancing work.

Fresh transplants are extra vulnerable to pests as they haven’t developed strong root systems yet. Make sure you’re spending time in the garden every day. It’s also time to get comfortable picking bugs off.

While there are some pest treatments that are considered acceptable in organic gardening, I don’t like to spray anything. Even seemingly innocuous treatments like diatomaceous earth and neem oil hurt the good bugs as well as the bad ones. But if you want to know some options, here’s a post on 12 strategies for fighting pests.

Proper watering, fertilizing, and mulching can help fend off disease. But if you are struck with plant illness or a plague of insects, all is not lost! I accept that I’ll probably lose my zucchini to squash bugs each summer, and just plan for a second succession once the little buggers have backed off come July.

You can often continue to harvest off ill plants for quite a while. You just want to pull them if they’re spreading their disease to others or if you could better utilize that space with a newer, healthier plant.

Step 9: Harvest and Save Seeds

Now for the moment we’ve all been waiting for: harvest! Whether it’s fresh spring peas, sweet summer tomatoes, or a rainbow of flowers, harvest is the moment that makes the work and sweat and the sunburn worth it.

You probably don’t need me to tell you how to pick a tomato, but there are a few things to keep in mind:

  • Most things prefer to be harvested in the cool morning before the sun has hit them and they’ve begun to wilt.
  • The exception is members of the nightshade family. Tomatoes, peppers, eggplants, and tomatillos will be sweeter if harvested in the heat of the afternoon. The stress of the sun causes their sugars to concentrate.
  • Even if you can’t harvest at the ideal time, don’t worry about it. A plunge in ice water will revive even the wiltiest lettuce.
  • Make sure you’re checking for ripe fruits just about every day. A zucchini or an okra can go from too small to in-edibly large within a day.

To close the loop on your garden and save money for next year, you can also save seeds from your garden plants. The method varies some from plant to plant, but Seed Savers Exchange has a guide to get you started.

A gray and white granite island is spilling over with garden produce. Yellow, orange, and red tomatoes are joined by an okra pod, green and yellow pole beans, zinnias, and multiple varieties of peppers.

Step 10: Putting the Garden to Sleep for the Year

At some point, the year’s garden will draw to a close. Hopefully, you’ve thoroughly been bit by the gardening bug and plan to continue next year. If so, there are some steps you can take now to best set yourself up for success.

First up: something I recommend you not do. That’s clean up. Minus clearing away and burning diseased plants, I’d suggest leaving spent plants and leaves as shelter for the critters and birds over winter. Wait til it warms up next spring to do so and be rewarded with a wider diversity of pollinators.

You can, however, spread new compost now. You can also take down and sanitize trellises and tools. Be sure to take notes on what went well this year and what you want to change.

And if you’re trying to continue anything into the cold months, be sure to protect plants from the cold!

Almost 3000 words later, I hope this basic primer on how to start a garden gives you the info you need to jump in. It can be as simple or as complicated as you want to make it. Just remember, plants want to grow – it’s literally programmed into their DNA.

Gardening is a wonderful way to spend time in nature, lighten your environmental footprint, and add deliciousness and beauty to your life. Grow a garden, feed your soul!

Pen drawing of an onion, some lettuce leaves, some peppers, a radish, a tomato, carrots, and a head of broccoli in dark green ink
Pinterest Pin reading "Gardening 101: How to Start a Garden" in white text on a blue banner. On the top is a patio table with four trays of seedlings. On the bottom is a kitchen counter spilling over with garden produce - tomatoes, peppers, green beans, and flowers.
Overhead shot of many small basil plants in a window box what to plant in may

May 21, 2022 Gardening

May Planting Guide: What To Sow Now!

The month of May is like Christmas for gardeners – it’s finally warm enough to really get things going! Check out my guide to what to plant in May depending on your hardiness zone!

Overhead shot of many small basil plants in a window box what to plant in may

After a semester-induced drought, I’m back and have loads of gardening and seasonal living content planned for the summer. First up in what will be a new series is a sowing guide of what to plant in May.

Obviously, what to plant will vary depending on where you’re at in the country/world, but for most of the temperate US, we’re now entering into the prime of garden season. Where I grew up in northern Illinois, Memorial Day weekend was the magic date everyone waited for for planting.

Here in central Ohio, I’ve already planted out most of my starts, but I’ll be doing plenty of seed sowing over Memorial Day weekend. For many summer crops that you direct seed, it’s best to wait a few weeks after your last frost date, when the soil is good and warm, to get them in the ground. But more on that later!

If you want to get right to the list of what to plant in May, feel free to scroll down to my zone-by-zone guide. If you’re a new gardener, stick around for some tips on what to keep in mind when planning and planting out the garden.

A lush summer garden. Two arched trellises have plants beginning to creep up. Cinder blocks line bed that are filling with growing plants. The background flowers grow. what to plant in may

Can you start a garden in May?

Absolutely! For much of the country, this is the ideal time to start your summer garden crops. But really, you can start a garden in any month – depending on your goals. See more below!

Inside of a raised wooden garden bed with small green seedlings. Two hands covered in dirt reach in. what to plant in may

Is May too late/too early to start a garden?

Certainly not! Depending on where you are, it may be too early to plant summer crops like tomatoes and peppers, or too late to plant cool-loving crops like cabbage and broccoli, but you can certainly start something! 

Really, even if it were November/December and too cold to grow anything, it would still be a great time to build new beds, amend with compost, etc. You can always be working on the garden!

Winter sun shines on two raised wooden garden beds freshly filled with soil. The beds meet in an L against the sides of a house. what to plant in may

How do you know when to plant?

When to plant (which is actually more a question of when to plant what crops because you can usually plant something), will be dictated by your hardiness zone and your last frost date. 

Your last frost date tells you when to expect your last frost, obviously. This is important because you certainly don’t want to plant anything frost-tender before that date, as you’re likely to lose it to the cold. Just keep in mind that your last frost date is a projection based on previous years’ data, so you should still keep an eye on the forecast.

Your hardiness zone is determined by what the average low temperature is where you live. Hardiness zones aren’t an exact science. For example, parts of South Carolina and Oregon are in the same hardiness zones, though their climates are very different. But they’re a good shorthand for tracking when to plant what as your area warms. Just keep track of your last frost date so you don’t accidentally plant to early. I’ve sorted what to plant in May by hardiness zone below.

USDA hardiness zone map of the United States what to plant in may

How do you find your USDA hardiness zone?

This one’s easy. Check out the map on the USDA’s website. You can even search your exact address – https://planthardiness.ars.usda.gov/

Image of the Farmer's Almanac frost date calculator what to plant in may

How do you find your last frost date?

You can just google *the city closest to you* + last frost date, and it should pop right up. You may find some variability depending on what site you choose, but I’ve found the Farmer’s Almanac pretty reliable.

A hand holds up a bright yellow sunflower what to plant in may

If it’s past your last frost date, can you plant anything you want?

Technically I suppose so, but that doesn’t mean it’s the best idea. You want to set your garden up to thrive, which means sowing and transplanting according to that crop’s needs. 

My last frost date is around April 30, but that doesn’t mean I rush out to plant my tomatoes, eggplants, and peppers. Those are all heat loving, tropical plants, so I usually wait a couple more weeks until the lows are consistently in the mid-50s before planting out. 

I’m also waiting to direct sow some other heat lovers, like my cucumbers and sunflowers.

On the other hand, you also want to be wary of planting cool season crops too late as they’ll just bolt before producing food for you. 

Use the planting calendars below as a guide for what’s appropriate to sow now.

Kale seedlings growing in soil blocks what to plant in may

What should you transplant as a seedling and what should you direct sow?

When planting your garden, you have basically two options. You can transplant seedlings or starts (either that you bought at a nursery or started yourself) or you can direct sow seeds.

Certain families of plants really don’t like having their roots disturbed. With these, your best bet is to direct sow. You’ll have happier, hardier plants, and you’ll save money because seeds are much cheaper than starts.

A started plant costs anywhere from $2-$6 depending on where you live, if it was grown organically, etc. A seed packet, which contains anywhere from ten to a few hundred seeds, costs the same. So it’s definitely a better deal to direct sow (or start your own seeds) if it’s an option.

Avoid buying starts for any sort of root vegetable (like carrots) or things in the curcurbit family (cucumbers, squashes, melons) because these don’t like having their roots disturbed. Likewise, I’d advise against buying starts for peas and beans or lettuces and greens. These grow super fast, so it’s just a better deal to grow them from seed.

Other things, like tomatoes, you want to transplant because they take longer to grow than your frost-free season is long. Transplanting an already started plant gives you a head start if you live somewhere with a shorter growing season. For many of us, this is the only way to get tropical crops like tomatoes, peppers, and eggplants.

If you’re unsure, take a look at a seed packet. Its instructions should say whether to direct sow or start indoors. It should also say the plant’s days to maturity. You can cross-reference this number against the length of your frost free season (calculated using your last and first frost dates). If the first number is longer, you should definitely go the transplant route.

A hand sprinkles seeds over a tray full of seedling pots set in a garden bed what to plant in may

Alright, so what can you plant in May?

Okay, here are some guides for what to plant in May for each of the hardiness zones in the US. Apologies if you’re not, but I needed some sort of limiting factor so I wasn’t writing a novel.

Many other countries have begun adopting the US hardiness zone system. So you can try googling *where you live* + hardiness zone and then try what I’ve outlined below.

Disclaimer that these lists are meant to be suggestions, not hard and fast rules. Please always go by your last frost date and what your weather is actually doing.

A hand dangles freshly dug carrots in front of the camera what to plant in may

What to Plant in May in Zone 3

  • Arugula
  • Beans
  • Beets
  • Broccoli and cauliflower
  • Brussel Sprouts
  • Cabbage
  • Carrots
  • Cold hardy, perennial herbs
  • Corn
  • Flowers
  • Kale
  • Lettuce
  • Peas
  • Potatoes
  • Radishes
  • Spinach
  • Swiss Chard
  • Turnips
Rows of potato hills with the greens growing out of the soil what to plant in may

What to Plant in May in Zone 4

  • Arugula
  • Beans
  • Beets
  • Broccoli and cauliflower
  • Brussel Sprouts
  • Cabbage
  • Carrots
  • Cold hardy, perennial herbs
  • Corn
  • Cucumber
  • Eggplant
  • Flowers
  • Kale
  • Lettuce
  • Peas
  • Peppers
  • Potatoes
  • Radishes
  • Spinach
  • Squash
  • Swiss Chard
  • Tomatoes
  • Turnips
A light green lettuce seedling pops against the background of dark soil what to plant in may

What to Plant in May in Zone 5

  • Arugula
  • Beans
  • Beets
  • Broccoli and cauliflower
  • Brussel Sprouts
  • Cabbage
  • Carrots
  • Cold hardy, perennial herbs
  • Corn
  • Cucumber
  • Eggplants
  • Flowers
  • Kale
  • Lettuce
  • Peas
  • Peppers
  • Potatoes
  • Radishes
  • Spinach
  • Squash
  • Swiss Chard
  • Tomatoes
  • Turnips
A freshly planted tomato seedling standing up out of a garden bed what to plant in may

What to Plant in May in Zone 6

  • Basil and other herbs
  • Beans
  • Beets
  • Carrots
  • Corn
  • Cucumber
  • Eggplants
  • Flowers
  • Kale
  • Lettuce
  • Malabar Spinach
  • Melons and Squash
  • Okra
  • Peppers
  • Potatoes
  • Radishes
  • Sweet potatoes
  • Swiss Chard
  • Tomatoes
  • Turnips
Two long cucumbers hanging from a vine rest on the soil what to plant in may

What to Plant in May in Zone 7

  • Basil and other herbs
  • Beans
  • Beets
  • Corn
  • Cucumber
  • Eggplants
  • Field peas
  • Flowers
  • Kale
  • Malabar Spinach
  • Melons and Squash
  • Okra
  • Peppers
  • Sweet potatoes
  • Swiss Chard
  • Tomatoes
A baby eggplant grows from its plant what to plant in may

What to Plant in May in Zone 8

  • Basil and other herbs
  • Beans
  • Beets
  • Corn
  • Cucumber
  • Eggplants
  • Field peas
  • Flowers
  • Malabar Spinach
  • Melons and Squash
  • Okra
  • Peppers
  • Sweet potatoes
  • Tomatoes
Three red bell peppers grow from a plant what to plant in may

What to Plant in May in Zone 9

  • Basil and other herbs
  • Beans
  • Cucumber
  • Eggplants
  • Field peas
  • Malabar Spinach
  • Melons and Squash
  • Okra
  • Peppers
  • Sweet potatoes
  • Tomatoes
  • Ginger and turmeric
An okra blossom and several okra grow in a field what to plant in may

What to Plant in May in Zone 10

  • Basil and other herbs
  • Beans
  • Cucumbers
  • Eggplant
  • Field peas
  • Malabar Spinach
  • Melons and squash
  • Okra
  • Peppers
  • Sweet potatoes
  • Tomatoes
  • Ginger and turmeric
A snap pea hands in a dense tangle of vines what to plant in may

I’d love to hear how your garden is growing and what you’ve planted (or plan to). Let me know in the comments below!

Pen drawing of an onion, some lettuce leaves, some peppers, a radish, a tomato, carrots, and a head of broccoli in dark green ink
Pinterest pin containing an image of a snap pea growing from the vine and text on a blue banner that reads, "Sowing Guide: What to Plant in May by hardiness zone" and "meaghangrows.com"
Zoomed out overhead shot of gingerbread sourdough pancakes on a black plate. The pancakes are topped with applesauce, cranberry sauce, and maple syrup. Beside the plate is a red tea towel with the word "jolly" stamped on it.

December 5, 2021 Breakfast

How to Make Gingerbread Sourdough Pancakes for Christmas Morning!

These warming, nicely spiced gingerbread sourdough pancakes are the perfect option for an easy Christmas morning breakfast! Make the night before (or even the morning of!) and enjoy a special, sweet breakfast that’s still gut-friendly!

Zoomed out overhead shot of gingerbread sourdough pancakes on a black plate. The pancakes are topped with applesauce, cranberry sauce, and maple syrup. Beside the plate is a red tea towel with the word "jolly" stamped on it.

Gingerbread seems to be one of those polarizing foods: People either love it, or they hate it. Like olives.

I love it (I hate olives). I love ginger, and will double (or triple) the amount called for in any recipe I make. Mr. Meaghan Grows, on the other hand, could do without. I made him extra bacon to make up for turning our Sunday morning sourdough pancake tradition into a recipe photo session.

This recipe was one of those ideas that once I got it into my head, I just couldn’t let it go. And the Google gods didn’t yield any options close to what I was imagining. There are sourdough pancake recipes galore. Ditto gingerbread pancakes. But the few gingerbread sourdough pancakes either used ingredients I didn’t want to use or were more complicated than I thought they needed to be.

So naturally, I decided to develop my own gingerbread sourdough pancake recipe.

This is really just a simple riff on the sourdough pancake batter recipe I make every week. I swap the maple syrup in the batter for molasses and add all your standard gingerbread spices (ginger, cinnamon, allspice, nutmeg, cloves). I also grated in a teaspoon of orange zest for a little extra sumpin’ sumpin’.

What I love about my base sourdough pancake batter is that it actually doesn’t call for any extra flour. Just the fed starter, eggs, melted butter/oil, salt, spices, and then a little baking soda right before you fry them up.

But the absence of flour means you don’t actually have to make these ahead of time, unlike most sourdough recipes. If you decide you want pancakes in the morning, but still want the gut benefits of sourdough, bam – you can have these in 20 minutes.

I do still usually make them the night before. I like the convenience of being able to roll out of bed and start breakfast while the coffee brews. But I love that this recipe can go either way, should I need it.

It’s a great recipe to have in your back pocket come Christmas morning. Or really, any snowy, peaceful morning in the winter when you want to put a little extra love in your breakfast – without much extra work. Though, if you’re looking for a project for Christmas morning breakfast, may I suggest my Eggnog and Spice Sourdough Cinnamon Rolls…

Image of iced sourdough cinnamon rolls in a cast iron skillet sitting on a granite countertop with a red dish towel laid to the side.

But, back to the business at hand:

What do gingerbread sourdough pancakes taste like?

They have all the tang and warm, fluffy butteriness of regular sourdough pancakes, with the addition of warm, holiday spices and some depth provided by the molasses.

Why are my sourdough pancakes gooey on the inside?

You probably cooked them on too high a heat. If your heat is too high, the pancakes will get too dark on the outside before the inside has a chance to cook through. Aim to cook your pancakes on medium, or maybe just a hair above.

Another trick is to watch the bubbles when the first side is cooking. When the bubbles have just begun to pop, you should be good to flip your pancake and wind up with fluffy insides!

A large jar full of bubbly, active sourdough starter sitting next to a large bag of King Arthur's All-Purpose Unbleached Flour

Are gingerbread sourdough pancakes healthy?

They’re probably about as healthy as pancakes can be, but they’re still pancakes. And you’re likely still pouring maple syrup on them. I will say the gingerbread sourdough pancakes are probably a bit healthier than my regular sourdough pancakes, as they use molasses in the batter instead of maple syrup or honey.

And, while not healthy, these are more gut-friendly than regular pancakes because of the use of sourdough!

What is “fed” sourdough starter? How do I know when my starter is ready to bake with?

“Fed” starter is sourdough starter that’s been fed recently and is not at its most active point. The yeasts consume the flour and release gases that give the starter, and things made with it, its lift. 

If a recipe calls for fed starter, you want to make sure you’ve pulled your starter from the fridge and fed it at least twice before baking with it. It should double in size after a feeding, and you should use it at its highest point. This will come anywhere from 3-12 hours after feeding, depending on the warmth of your house, but 4-6 hours is the more likely window.

Another test to ensure your starter has enough gas in it to rise is to drop a small spoonful into a glass of water. If it floats, you’re good!

Ingredients for gingerbread sourdough pancakes laid out on a granite countertop. A jar of sourdough starter, baking soda, salt, butter, an egg, and a variety of spices.

What do you serve with gingerbread sourdough pancakes?

Maple syrup is always a good option! Otherwise, I’ve served these with applesauce and cranberry sauce. If you like a bit of tart with your sweet, I bet an orange marmalade would also be excellent.

How can I make my sourdough pancakes more sour?

The sourness of sourdough products has to do with how hungry the starter is when it’s used. So that can be a bit hard to achieve with pancake batter, especially as this recipe calls for a fed starter. While these pancakes aren’t sour, they do have a pleasant tanginess.

If you really want a sour sourdough pancake, look for a recipe that calls for sourdough discard and that doesn’t sit overnight, but rather uses the discard for flavor and baking soda or powder for lift.

Overhead shot of a glass bowl containing the ingredients for gingerbread sourdough pancakes. You can see an egg, a variety of spices, molasses, and orange zest.

How long does sourdough pancake batter last?/Can you save sourdough pancake batter?

It’s best used within two days (provided you’re storing it in the fridge). Beyond that, the starter in the batter will begin to get hungry and more funky tasting, and the pancakes won’t have as good a rise.

Can you freeze sourdough pancakes?

Yes! If you want to freeze for later, I’d definitely suggest cooking and freezing the finished pancakes, not the batter. But, provided you’ve wrapped them well, they should freeze just fine!

Overhead shot of gingerbread sourdough pancakes on a black plate. The pancakes are topped with applesauce, cranberry sauce, and maple syrup.

What if I want regular sourdough pancakes, not gingerbread?

No problem! Cut the added spices and orange zest and swap the molasses for a milder sweetener like maple syrup or honey.

Bonus: what can I do with my discarded sourdough starter?

While making the batter for these gingerbread sourdough pancakes doesn’t generate discard, as you use fed starter, the process of feeding and prepping your starter to be made into batter will. Loads of recipes call for discard starter, but one of my favorites is just to turn it into a simple savory pancake. Pour your discard into a hot cast iron pan, flipping when it has turned golden brown. Serve with sesame seeds and some soy sauce for a nice snack!

Yield: 9-10 1/4 cup pancakes

Gingerbread Sourdough Pancakes

These warming, nicely spiced gingerbread sourdough pancakes are the perfect option for an easy Christmas morning breakfast! Make the night before (or even the morning of!) and enjoy a special, sweet breakfast that’s still gut-friendly!

Prep Time 10 minutes
Cook Time 20 minutes
Additional Time 12 hours
Total Time 12 hours 30 minutes

Ingredients

  • 1 ½ cups (382 g) fed sourdough starter at peak ripeness
  • 3 tbsp (46 g) butter or oil of your choice
  • 1 (56 g) large egg
  • 2 tbsp (41 g) molasses
  • ½ tsp kosher salt
  • 1 tsp ground ginger
  • 1 tsp ground cinnamon
  • ½ tsp nutmeg
  • ¼ tsp ground allspice
  • 1/8 tsp cloves
  • ¾ tsp baking soda
  • Optional: 1 tbsp orange zest

Instructions

  1. If using butter, coconut oil, or a fat that's solid at room temperature, melt and allow to cool for a moment or two.
  2. In a large bowl, combine all the ingredients except the baking soda and orange zest (if using). At this point, you can cover your bowl and refrigerate overnight.
  3. The next morning, preheat your pan to medium-high heat. If using cast iron, be sure to use a generous amount of butter or oil so your pancakes don't stick. I normally use an electric griddle as it allows me to cook more 'cakes at once.
  4. Once your pan is hot, add orange zest and baking soda to the batter and combine, being sure not to over-mix. (Note: you don't have to make this batter the night before. If making the morning you want to eat, just combine all the ingredients at once and proceed.)
  5. The baking soda will quickly begin to react with the batter, so act quickly to get the pancakes frying. Using a 1/4 cup measuring scoop (or whatever size pancake you like), ladle into the hot pan.
  6. Allow to cook a minute or two per side, depending on how brown you like your pancakes. Tip: wait until the edges look dry and the bubbles have begun to pop, but the center of the pancake still looks gooey before flipping.
  7. Repeat on the other side and with remaining batter. Serve with butter, maple syrup, applesauce, cranberry sauce, jam, fresh fruit, nuts – whatever your heart desires!

Notes

While I'm normally a big proponent of weighing your ingredients in baking, these pancakes are so forgiving that I just find it unnecessary. I have included gram measurements for all but the spices here, if that's easier for you!

If you want regular sourdough pancakes, swap the molasses for maple syrup or honey and omit the spices and orange zest.

© Meaghan
Cuisine: American / Category: Breakfast

Check out more of my Christmas/Holidays content:

  • Eggnog and Spice Sourdough Cinnamon Rolls
  • How to Make Scented Salt Dough Christmas Ornaments
  • Eco-Friendly Holiday Decor Ideas
  • 25 Great Gift Ideas for the Gardener in Your Life
Pen drawing of an onion, some lettuce leaves, some peppers, a radish, a tomato, carrots, and a head of broccoli in dark green ink

Pin it for later:

Pinterest pin containing an overhead shot of gingerbread sourdough pancakes on a black plate. The pancakes are topped with applesauce, cranberry sauce, and maple syrup. A blue banner reads, "How to make gingerbread sourdough pancakes – perfect for Christmas morning!"
A hand holds up a handful of compost feed the soil

November 30, 2021 Garden Problems

10 Must-Read Tips for How to Feed the Soil in Your Vegetable Garden

One of the best things you can do for your garden in the off-season is to feed the soil. Nutrient-rich soil yields healthy plants and high yields. Read on for 10 tips on how to get your healthiest soil ever!

A hand holds up a handful of compost feed the soil

It’s at about this point in the off-season that my fingers get to itching to be in the soil again. We’ve had our first snow, even the cold hardy stuff has gone into maintenance mode, and I just want to nurture growing things again.

Unfortunately, here in zone 6, I’ve got at least three months until I can justify starting any seeds. In the meantime, I’ll while away many hours this winter perusing seed catalogs and planning and re-planning my garden layout for spring.

But there is one thing I can be doing – that everyone can – to help guarantee next year’s is the best garden ever.

And that’s to feed the soil.

Soil is one of the most important factors in successful gardening. Having healthy, richy soil is how I was able to harvest over 100 lbs of food from just two 3x10ft beds – beds that were jam-packed with plants competing for nutrients.

If you’re wondering if you need to feed your soil, the short answer is yes. Feed the soil, feed your plants. Every year, your garden plants draw their nutrients out of the soil – tomatoes and other nightshades are particularly heavy feeders. 

Whatever you do, maintaining healthy soil should be at the very top of your gardening to-do list. And fall and winter is the ideal time to feed the soil so it can absorb all the nutrients before spring planting.

A large pile of soil on the driveway of a 1950s cape cod house feed the soil

First things first, what is soil?

Really, it might be more accurate to ask what are soil. It’s not just one thing, but a whole teeming world of microbes, bacteria, minerals, gases, liquids – a whole web of organisms that support life.

The life in the soil provides your plants with their access to nutrients, water, and air while also helping assist them in resisting pests and diseases.

Knowing your soil’s texture or consistency is helpful in knowing what it needs. This isn’t a foolproof method, but it’s pretty standard, for example, that a clay-heavy soil will need help with drainage whereas a sandy soil will need help holding moisture.

We classify soil in one of three ways:

  • Sandy soil – as it sounds, sandy soil is sandy in texture. It’s easy to dig in and slides easily through your hands. At the same time, nutrients and moisture slide right through it. Because of this, sandy soil can’t provide your plants with what they need to flourish on its own. Sandy soil will need amendments like compost or manure to help it retain moisture.
  • Clay soil – this is almost the opposite of sandy soil. Clay soil is heavy and compacts easily. The clay binds to elements in the soil, keeping water from draining and air from penetrating. Plants growing in clay soil risk root rot. These have trouble accessing nutrients because the clay locks them up. Clay soils need amendments that help them drain – so, again, compost, but also things like peat moss or coco coir (if your soil is loose enough that you can mix these in).
  • Loamy soil – the perfect balance between sandy and clay soils. It allows water to drain, but still clumps together when you squeeze it. Loamy soil tends to have a high quantity of organic matter, filling it with plant-happy nutrients.
Close up of the corner of a wooden raised garden bed full of rich, black soil feed the soil

What do I Feed the Soil?

What you feed the soil in your garden will vary according to its current needs – what it needs this year might not be what it needs next year. In fact, the more years you amend your soil, adding layers of compost etc, the better it will get and the happier your plants will be.

But a basic primer is that you want to feed your soil in ways that enable it to maintain its pH level and its balance of N-P-K. Most home vegetable gardens will do well with a soil pH of about 6.5, unless you’re growing something like blueberries that thrive in acidic soil. N-P-K are the three essential nutrients for plant growth: nitrogen, phosphorus, and potassium.

  • Nitrogen promotes leafy green growth, so it should be used sparingly – especially on fruiting or root vegetables.
  • Phosphorus helps to develop your plants’ root systems. Note that phosphorus doesn’t move through the soil easily, so you need to be sure to scratch it in really well.
  • Potassium aids your plants in fighting off diseases or drought. It also helps in developing fruits and bringing seeds to maturity.

More on the specifics on how to know what your soil needs below!

Close up of compost feed the soil

Why Feed the Soil?

Short answer: to be sure it contains the nutrients it needs to feed your future plants. If you want to maximize your chances of a healthy garden and high yields, feeding the soil is a necessary step. Feed the soil, feed the plants.

When Do I Feed the Soil?

Really, you can feed it at any point – when you fertilize during the growing season, that’s also feeding the soil. At Meaghan Grows, we tend to think of seasonal cycles: in the fall/winter, we do a big refresh of compost and leaf mulch. And then with each new planting, we add specific amendments and more mulch.

The off-season, aka fall and winter depending on where you’re growing, is a great time to refresh your garden beds with a few new inches of compost. That gives the soil a good few months to absorb all the new nutrients (and gives the compost more time to age in case it’s still a bit hot). We’d also suggest adding a layer of mulch or some other protection on top of the compost, so it doesn’t erode or compact too much before planting time.

How do I know what my soil needs?

The best way to know for sure is to get a soil test. These are offered by most county extension offices, either for free or for a very reasonable rate. I think here it’s $11. You can also buy soil test kits at garden centers, but these won’t be as accurate.

Worst comes to worst and you don’t know, just add compost! They don’t call it black gold for nothing.

Okay, so hopefully by now I’ve convinced you of the importance of feeding your soil. But what do you feed it? Read on for ten ways to feed the soil and prep for your best garden yet!

Note that I’m specifically talking about amending existing garden beds here – ones that have already grown at least one planting and now need their nutrients replenished. If you’re looking to fill new beds, check out “5 questions to ask before you fill raised garden beds.”

*Product images below are not recommended brands, just available images.*

Image of a soil thermometer in a hot compost pile. The thermometer registers 160 degrees F.

1. Compost

As mentioned above, when all else fails, add compost. You may not be able to target a specific deficiency, but compost will add loads of good stuff to your soil. Essentially, compost is just decomposed organic matter – think kitchen scraps, leaves, garden waste, etc. With the right balance of greens and browns, the help of decomposers like earthworms, and a little time, scraps and waste break down into nutrient-rich compost.

If you have the space, close the loop on some of your own waste by setting up your own compost piles or building a bin system. If that’s not an option right now, you can source good quality organic compost from a garden or landscaping center. Some cities also provide it.

A black and white cow eats grass in a field with the sun shining behind it feed the soil

2. Manure

When it comes to adding manure to your garden, there are actually several options, Most animal/livestock manures *must* be composted before they can safely be used as soil amendments. Also be careful of where you’re sourcing manure from as it can be laced with herbicides.

Alpaca and rabbit manure are the exceptions to needing to be composted as these are considered “cold” manures. These can be spread fresh on your garden beds.

And then there’s also green manure, or plant matter still in the process of decomposing. These can come from other parts of your garden or yard or can be grown specifically with the intent to be turned in to the soil, like cover crops. More on those below!

Manures are great ways to add nitrogen to your garden soil.

Overhead view of a woody pile of compost feed the soil

3. Mulch

Like compost, mulch is a sort of all-around wonder amendment. Mulch is essentially just any material you use to cover bare soil. Common mulch choices in gardens include wood chips, straw, cardboard, and fallen leaves. 

Mulch feeds the soil as it decomposes, essentially becoming more compost. But it also has a host of other benefits beyond feeding the soil, including suppressing weeds, improving moisture retention, and reducing soil erosion.

Pea and oat cover crop swaying in a field feed the soil
Pea and Oats Mix Organic Cover Crop from Johnny’s Seed

4. Cover Crops

Cover crops are those grown with the intent to turn into green manure – i.e. you’re not going to eat them. You’ll either till them into the soil, or, if you practice no-till gardening as we do here, cut the stems off at the soil line and leave the roots to decompose. Many cover crops are nitrogen fixers – like fava beans or legumes – so they restore the nitrogen depleted by crops like tomatoes or peppers. They also act as a living mulch, preventing soil erosion and compaction.

Two bags and three boxes of varying sizes of Down to Earth all natural slow release fertilizer feed the soil
Down to Earth Slow-Release Vegetable Garden Fertilizer

5. Slow Release Fertilizer

As the name suggests, slow release fertilizer is designed to degrade into the soil, releasing its nutrients over time – as opposed to something like a foliar spray, that will deliver a quick hit of nutrients through your plants’ leaves. Slow release fertilizers tend to be the granular type that you top dress or scratch in. Different fertilizers have different balances of NPK so you can select one based on your soil’s current deficiencies or in anticipation of what you plan to grow in that bed in the spring.

Cropped image of a bag of Espoma Organics blood meal on the left and a pile of blood meal on the right feed the soil
Espoma Organic Blood Meal

6. Blood Meal

Now we’re getting into the more targeted amendments. As the name suggests, blood meal is dried and ground up animal blood – usually cow blood, but it can come from any animal that goes through a meat packing plant. Blood meal both adds nitrogen and can acidify your garden soil, if you’re growing things that prefer lower pH. 

Note, though, that blood meal is super concentrated. So you don’t need a lot, and you don’t need it often. Be sure to follow the instructions as too much nitrogen is bad for your soil. At best, it will encourage your plants to put too much effort into leafing out – and not enough into fruiting or developing roots. At worst, it can burn and kill your plants.

If you struggle with critters getting into your garden, blood meal can also help to deter them as they don’t like the smell.

Bag of Dr. Earth Premium bone meal feed the soil
Dr. Earth Premium Natural Bone Meal

7. Bone Meal

Bone meal also comes from animals butchered for meat. It comes from steamed animal bones, which are then dried and ground into granules you can distribute into your soil. It’s rich in calcium and phosphorus, and, like blood meal, it breaks down slowly. It’s also rich in other minerals like magnesium, zinc, and iron – all of which will benefit both your soil food web and your plants’ growth. 

Unlike blood meal, bone meal may actually attract animals – particularly dogs who will go digging for the “bones.” And you don’t want your dog ingesting too much bone meal as it will make them sick.

Also, if you want to use bone meal, be sure you’ve tested your soil and know its pH is below 7. According to a study done at Colorado State, the phosphorus in amendments like bone meal is only bioavailable to plants in acidic soils.

A green bag containing the label for Uncle Jim's Worm Farm Worm Compost and a pile of worm castings in the foreground feed the soil
Commercially available worm castings from Uncle Jim’s Worm Farm

8. Worm Castings

Really, I could have listed worm castings under compost as a specific variety of it. But worm castings are so beneficial – and so easy to get a hold of – that I think they deserve their own entry. Basically, worms are some of the decomposers in regular compost. But in special vermicompost bins, worms break down and digest the waste, leaving behind worm castings. It’s basically their poop, but through their digestive process, magic happens. The worms break down the nutrients into more bioavailable forms for your soil and plants. 

Worm castings are also called vermicompost if you’re looking to buy them. But a worm bin is also a super simple, small-scale composting option for anyone in an apartment or the city – or who just wants the benefits of having readily available worm castings!

Pile of alfalfa meal
Organic Alfalfa Meal from Rocky Mountain Organic Supply

9. Alfalfa Meal

As with the other items in this article referred to as a “meal,” alfalfa meal is just dried, grounds alfalfa plants. Alfalfa meal makes a great soil amendment or fertilizer because it not only contains N, P, and K, it also contains a variety of micronutrients and the growth hormone Triacontanol. Triacontanol is a natural growth hormone that aids plants in growing larger and thicker, and blooming longer. 

The NPK content in different alfalfa meal products can vary, but it should be around 3-1-2 (i.e. 3 parts nitrogen to 2 parts phosphorus to 1 part potassium). Micronutrients are also present in lesser amounts, but your plants need less of them. Among the nutrients that can be found in alfalfa meal are calcium, magnesium, sulfar, manganese, iron, copper, boron, and zinc.

Two hands hold up a handful of pink potash above a large bag feed the soil

10. Potash

Finally, potash is a wonderful amendment for soils lacking potassium. Potash, which is really just an old-fashioned term for potassium, is a salt harvested from underground prehistoric sea beds.

Potash is critical for balancing out alkaline soils, as well as adding potassium. It supports your plants’ health as well as helping them grow bigger fruits, higher yields, and more abundant flowers.

Of course, there are also loads more targeted amendments depending on your soil’s needs. I tried to cover ten of the most popular here, but your best bet is always to 1. get a soil test and learn exactly what your soil needs, and 2. always add more compost!

Pen drawing of an onion, some lettuce leaves, some peppers, a radish, a tomato, carrots, and a head of broccoli in dark green ink

Pin it for later:

Pinterest pin containing an image of a hand holding up a handful of compost and a blue banner reading, "10 Must-Read Tips on How to Feed the Soil in Your Vegetable Garden"
A man lying on his side cutting down a Christmas tree, more trees in the background

November 23, 2021 DIY

Eco-Friendly Holiday Decor Ideas (How to Decorate Sustainably + Cheaply!)

Want to spread the holiday cheer around your home without resorting to poorly made plastic decorations? Check out this post for thoughtful eco-friendly holiday decor ideas!

The time has come to deck the halls with boughs of holly – possibly. Maybe. Depending on who you are. It seems people are pretty split – I’ve seen a bunch of people decorating earlier and earlier (cause you know, we need some joy in the midst of COVID). And others holding fast and insisting no Christmas or Hannukah stuff til after Thanksgiving.

Where do you fall? Is it still all turkeys and pumpkins with you? Or the more holidays the merrier? Let me know below.

Personally, I’ve tried to strike a middle ground. I still have Fall things up, including a pumpkin pie slice bunting especially for Thanksgiving. But I’ve also snuck in a couple of Christmas-y things, like tree-shaped candles. Nothing too over-the-top Christmas-y, but a little extra festive.

But watch out – by the end of this week we’ll have our tree, and the decorating will well and truly begin. Last year was our first Christmas in this house, and our first one staying home instead of visiting parents (thanks COVID), so it was the first year I really tried to go all-out decorating.

And I quickly became frustrated not just at the cost, but also that so much of what’s available for holiday decor is plastic and poorly made. I didn’t want to blow my budget on stuff I wouldn’t even like the next year because it just looked tacky.

While I did buy some holiday decor, and I’ll buy a few more things this year, I ultimately went more of the homemade route, opting for natural materials that just feel more cozy. Not only did I wind up with more eco-friendly holiday decor ideas, I saved money by making many myself.

Below, find some of eco-friendly holiday decors ideas I implemented last year, plus more I hope to try this year. Holiday decorating can be beautiful and festive while still being eco-friendly, low-waste, and wallet-conscious!

Let’s start with the big one: the Tree. 

Unfortunately, there really isn’t an easy option here – while you save money and convenience with an artificial tree, it will invariably be made of plastic. And, even if you keep it for years, it will still eventually wind up in a landfill. Real trees are more expensive – and many still wind up in landfills.

We opt for the real tree. Beyond loving the smell of the fresh tree and the trip to the Christmas tree farm, it’s the most eco-friendly decor idea for us for a couple reasons. 1. Christmas tree farms help the environment. They keep land open for the ecosystem, cleaning the air and providing wildlife habitats and watersheds, rather than being turned into more housing developments. And 2. we chop up our tree when it’s done decorating our house and use it in the bottom of a hugelkultur garden bed. If you’re not planning to build any new garden beds this coming year, you can also compost a real tree.

  • Rolled out salt dough ornaments arranged on two cookie trays with a rolling pin to the side
  • Close-up of Christmas tree showing hanging salt dough ornaments, dried oranges, and a red and white gingham ribbon

Decorate the tree with natural materials

Rather than buying a bunch of plastic ornaments that can break, or ones that you’ll decide you don’t like in a year and want to replace, opt for homemade ornaments or ones made with more natural materials.

You can dehydrate oranges to create ornaments with a lovely stained glass effect. Salt dough ornaments are a fun project to do with kids – and with the addition of spices or essential oils, they smell lovely.

You can also collect pine cones while on a walk, cut out paper snowflakes to hang, or even reuse old photographs.

“Garland complete on the tiny fake tree 321/365” by Carol Browne is licensed under CC BY-NC-SA 2.0

Or raid the kitchen to make a popcorn and cranberry garland

Beyond the ornaments and lights, you’ll want some sort of tinsel or garland for your tree. Rather than the shiny plastic stuff that sheds, make a homemade garland by stringing popcorn and cranberries using a needle and twine. Bonus: Christmas colors!

Bring the outside in with wreaths and garlands

My next eco-friendly holiday decor idea is, again, to opt for the real stuff over the artificial when it comes to wreaths and garlands. You can make it yourself to save money or it buy it from a local farm to support a small business.

Plus, they last surprisingly long. We left last year’s wreath up on the door until it had dried to a lovely bronze color. Then I brought it back out this year as a fall wreath.

Suggestion: Incorporate fresh herbs into your wreath so it smells even better!

Use LED lights instead of incandescents

LED lights are more energy efficient and last longer/are loss prone to breaking. 

Make stockings out of an old sweater

If you have some basic sewing skills, you can close the loop on an old or damaged sweater by upcycling it into a stocking rather than throwing it away. Check out this tutorial from Lisa at Farmhouse on Boone to learn how!

Grow your decor with amaryllis or paperwhites

This is a great eco-friendly decor idea for the gardeners. In the winter when our gardens are dormant, grow inside with amaryllis or paperwhite bulbs. Many stockists even have suggested growing instructions so you can time your bulbs to bloom for Christmas.

Likewise, snag a potted poinsettia for more natural decor!

Buy your holiday decor secondhand

Finally, if you’re sourcing places to buy eco-friendly holiday decor, opt for a thrift shop. You can support a local business without adding to the massive amounts of waste produced every holiday season.

If you’re looking to refresh your decor scheme but still have perfectly good decorations, set up a decor and cookie swap party with some friends!

And don’t forget to consider eco-friendly or low-waste options for the holidays beyond the decor. Opt for real dinnerware rather than paper and plastic and look for recyclable gift wrap options, like craft paper.

Whether you’ve begun decorating yet or not, I hope these eco-friendly holiday decor ideas help you be more intentional about how you bring the cheer of the season into your home. Let me know in the comments which of these ideas you plan to try – or if you have another eco-friendly holiday decor idea to share!

Pen drawing of an onion, some lettuce leaves, some peppers, a radish, a tomato, carrots, and a head of broccoli in dark green ink
Pinterest pin that reads, "Eco-Friendly Holiday Decor – How to Celebrate Sustainably" on a blue banner above an overhead image of four red candles on a plate surrounded by pine branches, cinnamon sticks, and paper cut-out reindeer heads
A blond woman models a purple roo apron in a field of squash plants

November 18, 2021 Lifestyle

25 Great Gift Ideas for the Gardener in Your Life

Check out 25 great gift ideas for the gardener in your life – even if that gardener is you. Suggestions of gardener gift ideas for the holidays, or any birthdays or special events that pop up the rest of the year!

I love giving gifts. No lie, I start my Christmas shopping each year in October – even if just in the form of online window shopping and making lists of gift ideas. And unfortunately (/fortunately? I haven’t decided yet), my partner and both of my parents have autumn birthdays, so my gift giving muscles get quite the workout between September and December.

But while I love giving gifts, I recognize I’m a rather difficult person to give gifts to. Beyond books, which I’m always thrilled to receive, I’m picky about colors and fabrics. And as I’m trying to reduce consumption, I don’t want people to spend money on me if it’s something I won’t use and love.

So if you also have a picky gardener in your life, I thought I’d throw together this list of 25+ gardener gift ideas that I, and most gardeners, would love to receive.

(Also just FYI none of these gardener gift ideas are affiliate links, just products I love or think would make thoughtful gifts!)

While they weren’t a Christmas gift, two of the best gifts I’ve ever received were the raised wooden garden beds my partner built me last winter. As I told him then, he literally fulfilled a childhood dream of mine – one started when I first read the Little House and Anne of Green Gables books when I was six years old. So that, of course, is my first gift idea –

[potting bench photo courtesy of Ana White]

1. Go homemade – build a garden bed or potting bench

Find the plans we used to build our beds here, or check out these 65 DIY Potting Bench Plans.

2. Or go store-bought with a Vego garden bed

These modular metal raised bed kits can be reconfigured to fit your gardener’s space. And, being metal, they should last for ages!

3. Outfit the apartment gardener with a Greenstalk Garden

If your gardener has limited space, or is just trying to maximize the space they do have, a Greenstalk garden is an excellent gift. This tiered vertical planter can really grow so much food.

4. Bring the garden indoors for winter with a Microgreens Kit

Microgreens are a tasty little nutrient powerhouses. And, as far as gardener gift ideas go, a microgreens kit is a great way to give your gardener a growing outlet for when their outdoor beds are covered in snow.

5. Keep their feet dry with some cute clogs or Gardening Boots

Spring gardening is the best because you finally get to get your hands back in the soil and nurture growing things. Spring gardening is the worst because it’s mud and muck season. Keep their feet toasty and dry with some garden-approved footwear.

6. Upgrade their tools

Try these stylish gloves or this hori hori knife!

7. Help reap the harvest with a Garden Hod

At the height of summer, the bounty can get a little unwieldy. Make the trip from garden to kitchen counter easier with a garden hod.

8. …or with a Roo apron (or the Joey half-apron)

These are so convenient – both hands free to pick or weed or what have you!

9. Enable them to sport garden gear wherever they are with Nature Supply Co

“Eat Sleep Garden Repeat” is my official mantra.

10. Deck out the garden

In the words of Jessica Sowards, “the best medicine for the garden is the gardener.” Help make the garden a place they love to relax with decorative items like signs, wind chimes, or a fancy rain gauge.

Image courtesy of Gardener’s Supply Company

11. Invite nature in with a bee or bird house

Welcome all the pollinators!

12. Help them enjoy the space they’ve created with a Hammock

They’ll mentally thank you every time they take a nap in their garden next summer.

13. Get them the materials for a Vermicompost bin

Or if you’re on a tight budget, make a simple, city-friendly outdoor compost bin with this tutorial!

14. Help them level up next year’s garden with a Grow Light or Seed Starting Kit

15. Or challenge an intermediate gardener with a soil block maker

If they already start their own seeds, help them do so while reducing their plastic use with a soil block maker.

16. Protect their hands with a Gardener’s Spa Gift Box

Gardening wreaks havoc on the hands, so a classic gardener gift idea is a soothing hand salve – this gift box takes the basic salve up a notch!

17. Help them preserve the harvest with tools like a Fermentation Kit

18. …or a Dehydrator

I love my Excalibur. In spring of 2020, when everyone else was hoarding toilet paper, I panic purchased a dehydrator. And you know what? Totally worth it. I use it all the time.

19. …or a Vacuum Sealer

For the newbie gardener who’s still intimidated by canning, a vacuum sealer will let them freeze their harvests to preserve for future eating – no freezer burn!

  • Book cover of Rodale's Ultimate Encyclopedia of Organic Gardening
  • Book cover of The Vegetable Gardener's Bible
  • Book cover of The Year-Round Vegetable Gardener

20. Books on Gardening

In my view, few presents can top a great book. I’ve attempted to restrain myself here, but the next few items curate a handful of books on garden-related topics. On gardening itself, try The Vegetable Gardener’s Bible, Rodale’s Ultimate Encyclopedia of Organic Gardening, or the Year-Round Vegetable Gardener.

  • Book cover of the Ball Complete Book of Home Preserving
  • Book cover of Food in Jars
  • Book cover of The Forager's Pantry

21. Books on using + preserving the harvest

Or, help your gardener enjoy and preserve their bounty with one of these cookbooks: Food in Jars, the Ball Complete Book of Home Preserving, or The Forager’s Pantry.

  • Book cover of Braiding Sweetgrass
  • Book cover of Gaia's Garden
  • Book cover of The One-Straw Revolution

22. Books that feed a gardener’s soul

Finally, check out Braiding Sweetgrass, The One-Straw Revolution, or Gaia’s Garden for a book that speaks to their plant-loving soul.

23. Membership to a local arboretum or botanic garden

Give the gift of inspiration – or at least a place to walk among growing things when their garden is dormant.

24. Gardening journal

Give them a handy place to record their notes so next year’s garden can be better than ever!

25. Finally, you can’t go wrong with a seed catalog and gift card!

Let them pick exactly what they want to grow in next year’s garden. Find some of my favorite seed companies in this post!

I have so many more ideas that I didn’t have space to include here (Indoor mushroom logs! Copper plant markers!) but I want to hear from you, fellow gardeners – what’s on your holiday wishlist?

Pen drawing of an onion, some lettuce leaves, some peppers, a radish, a tomato, carrots, and a head of broccoli in dark green ink

Pin it for later:

Overhead shot of four roasted pumpkin halves on a parchment-lined sheet tray

November 9, 2021 Desserts

How to Make Homemade Pumpkin Puree (+10 Ways to Use It!)

Learn how to make homemade pumpkin puree from a fresh pumpkin as well as the best pumpkin varieties for cooking and eating! 

Overhead shot of a pile of Cinderella and Musquee de Provence pumpkins

Did you know that over 1.3 billion pounds of pumpkins are sent to the landfill every year in the United States? And that number doesn’t even account for the “ornamental” squashes and gourds people use in their autumn decor.

While you may think tossing your pumpkins and gourds is fine as they’re organic matter that will just break down in the landfill, you’d be sorely mistaken. Unfortunately, even organic matter can’t break down if it’s not in the right conditions (you know, like if it’s contained in an air-tight plastic bag).

So what are you to do with all those pumpkins? Certainly not stop buying/growing them. If you have a compost pile/bin, compost them! They’ll become food for next year’s garden. Otherwise, you can find a local farmer who may like the free treat for her livestock, or break your pumpkins open and leave them in the woods for the local deer and other fauna. Do break them open though – otherwise deer can get their heads stuck in them.

Overhead shot of pumpkin soup sprinkled with pepitas and paprika

Better yet, before composting or giving to the local forest creatures, roast your pumpkin and make your own homemade pumpkin puree! 

Homemade pumpkin puree is so, so delicious and so much better than the stuff in the can. It takes some time but no great skill, and you’ll be able to boast come Thanksgiving that your pie really is from scratch. Read on to learn how, as well as a recipe round up for how to use your pumpkin puree bounty.

A glass bowl containing the seeds and guts removed from a pumpkin processed for homemade pumpkin puree

What is pumpkin puree?

First things first – no silly questions here. Most of us have become so alienated from our food supply that the process of going from pumpkin plant to the mushy stuff in the can is mystifying.

It’s simple, really: pumpkin puree is just pureed pumpkin flesh. You roast the halved pumpkins first to soften them and bring out all the sweet, caramelized notes. Then scoop it out of the skin and into your food processor to blitz up. Voila – that’s what comes in the can.

Of course, homemade pumpkin puree is much sweeter and more flavorful than anything you can get at the store. Totally worth the bit of extra work, especially as we’re looking at another pumpkin shortage this year. If you grew any pumpkins in your summer garden, I’d definitely suggest making your own puree for that pumpkin pie this year.

A hand separates pumpkin seeds from guts over a bowl

What’s the difference between pumpkin puree and pumpkin pie mix?

You may have noticed – or accidentally purchased – pumpkin pie mix alongside the cans of pumpkin puree at the store. Well, pumpkin pie mix is to pumpkin puree what cake mix is to flour and sugar. It just does a few of the steps in the recipe for you. Pumpkin pie mix already has the spices you’d want in a pie added into the can, so you just need to mix in the liquid ingredients before pouring into the pie shell.

You certainly could do that with your homemade pumpkin puree if you know you plan to use it for pie. Portion into the amount your pie recipe calls for and add in the spices before storing/freezing. I like to leave mine plain, though, so I can easily use it in savory applications like soup as well as pie.

Overhead shot of roasted pumpkin seeds on a parchment-lined cookie sheet

Is pumpkin puree good for you?

It’s so good for you!! Pumpkins, a member of the cucurbit family, are packed with nutrients. On top of being low in calories and fat, it’s high in fiber and vitamins A, C, E, K, and B plus iron magnesium, manganese, potassium, thiamin, niacin, folate, and copper.

And it’s not just good for you – pumpkin is also a great supplement for dogs and chickens!

Overhead shot of four pumpkin halves on a parchment-lined sheet tray. In the bottom right corner is a bowl containing the pumpkin seeds and guts

Which pumpkin varieties are best for cooking and eating?

As always, organically grown is better than conventional. Pumpkins are prone to powdery mildew and other squash maladies, so conventionally grown ones have likely been sprayed with pesticides which not only linger in the fruit but also pollute groundwater.

But, if you can’t afford or access organic, your homemade puree is still going to be more nutritious and delicious than the canned stuff at the store which was also made with conventional pumpkins.

As far as specific species of pumpkins, the classic is the sugar pie pumpkin. These are often what you find for sale at the grocery store in October and November. These are some of the sweetest of all pumpkins and so perfect for your Thanksgiving pie.

But loads of other varieties are great too! Many heirloom pumpkin varieties will have more complex or interesting flavors. The pumpkins in the photos you see in this post are the Long Island Cheese Pumpkins I grew this year. Some other great choices to look out for (or grow next year!):

  • Jarrahdale
  • Musquee de Provence (these are beautiful and near the top of my to-grow list!)
  • Cinderella
  • Baby Bear
  • Galeux d’Eysines
  • Dickinson Pumpkin
  • Seminole Pumpkin
  • Black Futsu

I wouldn’t recommend using your Halloween Jack-O-Lantern. I know people who have, but it’s not the most flavorful. And if you’ve carved it, definitely steer away – that’s been sitting exposed on your porch for like a week.

Overhead shot of four roasted pumpkin halves on a parchment-lined sheet tray

How does homemade pumpkin puree compare to the stuff in the can?

As with any fresh vs. canned food, your homemade pumpkin puree will be more nutritionally dense. I also find it much sweeter and more flavorful – especially if you’re making it from an heirloom pumpkin variety. 

On the flip side, homemade pumpkin puree tends to be more watery than the canned stuff. You can just plan to decrease the liquid content in any recipes that call for canned pumpkin. But I also have two other methods for combating the liquidiness. One, you’ll see below I call for straining your puree through a cheesecloth for a few hours. Two, you can also just cook your puree and cool it before using it in a recipe. Basically, dump it into a saucepan, bring it to medium heat, and allow some of the water cook off until you hit the right texture. A bonus is cooking it further emphasizes the caramel-y flavors you want in pie. Of course, for something like soup, the extra liquid won’t do any harm.

Over heat shot of pumpkin seeds whose flesh has been scraped out, sitting on a parchment-lined sheet tray with a spoon

What’s the difference between pumpkin and squash? Can I make pie out of squash?

I think of it like geometry – you know, squares are rectangles but not all rectangles are squares? Well, a pumpkin is a squash (cucurbit) but not all squashes are pumpkins. Generally, if it’s round, orange, and lobed it’s a pumpkin.

Of course, this gets more confusing as in some countries they refer to all squashes as pumpkins. So they might refer to a butternut pumpkin whereas in the US we’d call it a butternut squash.

All that said, you can make pumpkin pie out of non-pumpkin squashes, just not all of them. If you can’t find a pumpkin, look for a squash with similar flavors/characteristics. For example, I’d expect a butternut squash, a kabocha, or a koginut to all work well. You can follow the same method of pureeing and roasting below, they may just differ in roasting times.

Overhead shot of a food processor full of fresh homemade pumpkin puree

How do you make pumpkin puree?

I’ll go through the full step-by-step in the recipe card below, but here’s how I do it. Cut the stem off your pumpkin with a very sharp knife and then halve it. Scoop out the seeds, guts, and stringy bits (reserving for roasted pumpkin seeds if you like!). Place it cut side down on a parchment-lined baking sheet and poke a few steam holes in the back. Roast at 400ºF for 45-60 minutes. It’s done when you can easily pierce it with a knife.

Allow to cool so you can handle comfortably, then scoop the roasted flesh into a food processor blender and discard the skins. Process until you have a smooth puree. At that point, you can use it just like canned pumpkin! However, I like to put it in the fridge in a cheesecloth-lined colander sat in a bowl overnight. This allows excess liquid to drain off so the homemade pumpkin puree is closer in texture and moisture-level to the store bought, which most recipes are based on. Then I take my biggest cookie tray lined with parchment and apportion half cups of puree. I freeze these then pop them in a stasher bag so I can easily grab and defrost just the amount I need for a recipe.

Some people will just stick the whole pumpkin in the oven and roast until soft. The reasoning is that it’s easier to cut in half once roasted, especially if you don’t have good knives. However, I don’t prefer this method as I find it harder to remove the seeds. The difference between the stringy bits and the roasted pulp was harder to define once roasted so I lost more of the would-be puree whilst removing seeds and guts as it was all soft and came away with the spoon.

Overhead shot of bright orange homemade pumpkin puree draining in a cheesecloth-lined colander

How long will pumpkin puree last?

If you’re keeping it in the fridge, try to use it up within a week. If you freeze it, it should be good for about a year. Though, of course, over time you’ll sacrifice some quality and texture.

Note that you cannot can pumpkin puree. If you have a pressure canner, you can can diced or chunked up pumpkin cubes. But you can’t water bath can it and it can’t already be pureed.

A parchment-lined sheet tray containing half-cup scoops of homemade pumpkin puree

Can you freeze pumpkin puree?

As you may have guessed from my responses above, yes! Dividing it into recipe-sized portions (usually half a cup) and freezing is my preferred method for storing puree. It lasts ages and you can defrost just as much as you need at any one time. Again, I separate into portions on a parchment-lined cookie sheet so I can freeze individually. Then I put everything into a bag and keep it in the freezer.

Pumpkin pie surrounded by apples and small pie pumpkins

How do you use homemade pumpkin puree?

In short, anywhere you would use canned pumpkin puree! Certainly use it to make your Thanksgiving pie, pumpkin bread, or cookies.

I love it stirred into oatmeal or pancakes. Or you can make a homemade Pumpkin Spice Latte.

And don’t forget savory applications like this pumpkin soup, chipotle black bean dip, chili, or risotto.

Alright, ready for the recipe card to make your own homemade pumpkin puree?

Homemade Pumpkin Puree

Overhead shot of bright orange homemade pumpkin puree draining in a cheesecloth-lined colander

Homemade pumpkin puree is sweeter, more flavorful, and more nutritious than the stuff in the can. Roast your own and then make the best Thanksgiving pie of your life.

Prep Time 10 minutes
Cook Time 45 minutes
Total Time 55 minutes

Ingredients

  • Fresh whole pumpkins
  • Other equipment: cutting board, sharp knife, spoon, large bowl, parchment-lined cookie tray, blender or food processor, colander, cheesecloth

Instructions

  1. Preheat your oven to 400ºF.
  2. Wash your pumpkins to remove any dirt. Slice off the top and stem.
  3. Cut your pumpkins in half. Use a spoon to scoop out the seeds, guts, and stringy bits. Reserve in a large bowl if you want to roast the seeds later.
  4. Place cleaned pumpkins cut side down on a parchment-lined cookie tray. Poke a few holes in the back of the skins for steam to escape.
  5. Roast for 45-60 minutes, or until a knife can easily pierce the pumpkin's skin.
  6. Allow to cool until your pumpkins can be safely handled. Scrape the flesh into the bowl of a food processor blender. Discard the skins.
  7. Process or blend until smooth. You now have pumpkin puree!
  8. (Optional) Transfer your puree to a cheesecloth-lined colander set in a large bowl. Put in the fridge overnight to allow excess liquid to drain out of your puree.
  9. Now use or store your homemade pumpkin puree! If you're going to freeze it, I'd suggest portioning it into half-cup portions and freezing on a cookie tray before storing so you can defrost just as much as you need in the future.
© Meaghan
Category: Preserving
Pen drawing of an onion, some lettuce leaves, some peppers, a radish, a tomato, carrots, and a head of broccoli in dark green ink
Pinterest pin containing image of a food processor full of homemade pumpkin puree. A blue banner at the top reads, "How to make Homemade Pumpkin Puree" and "meaghangrows.com"
Overheard shot of chopped apples on a black cutting board with a chef's knife and whole apples off to the side

November 5, 2021 Breakfast

How to Make the Easiest Healthy Applesauce

Learn how to make healthy applesauce from scratch and the best apple varieties for cooking. Follow this tutorial to learn different ways of cooking applesauce – stovetop or crockpot, chunky or smooth, sweet or spiced.

Three apples rest in a person's outstretched hands

As the weather cools and the leaves turn, all I want to do is 1. Be outside crunching on leaves or 2. Be in my kitchen cooking up fall goodies. Today’s recipe for the easiest homemade healthy applesauce enabled me to do both!

We’re far from being able to have our own apple trees at this little urban homestead. But we do take advantage of the abundance of local farms that offer apple picking. Our favorite, Branstool Orchards in Utica, OH, is dog-friendly! (It’s actually the same orchard where I got the peaches for the peach pepper jam I shared this summer.)

A man walks a black dog between two rows of apple trees. In the distance, the trees are a riot of autumnal color.

Every autumn, we bundle up and make the drive out of the city, returning in the evening with our abundance and my brain brimming with plans.

Of course, we often wind up eating so many fresh that I don’t get to test all of my ideas. I used the end of this year’s apples to make this healthy applesauce. But next year I want to use some of the bounty to can mincemeat pie filling as a surprise for my dad.

A bunch of red apples grow on a branch of an apple tree

I love to make a huge batch of this healthy applesauce and then freeze it in canning jars. I pull them out one at a time throughout the year for adding to oatmeal, spooning over ice cream, or serving with pork chops and potato pancakes.

The great thing about this recipe is that it’s more method than recipe. Make it with whatever quantity of apples you have, and just scale the other two ingredients (apple cider and pumpkin pie spice) to taste.

It’s so simple, and a healthy treat that really can’t be beat. If you’ve never made applesauce before, I hope you try it and let me know what you think in the comments!

A pile of red apples fills the frame

What makes this applesauce healthy?

For starters, there’s no added sweetener – just a half cup of apple cider. You could even omit that or swap it for water. I just find that added bit of moisture helps the apples begin to cook down faster.

But, compared to the sweetener and preservatives you’ll find in store-bought applesauce, I think the little bit of cider is no big deal.

Plus, apples are full of fiber, vitamin C, and potassium!

Close up of chopped apples

Isn’t homemade applesauce a lot of work?

Nope! At least, this one isn’t. It requires a sum total of three ingredients and four kitchen tools (a cutting board and knife to prep the apples, and the pot and wooden spoon to cook them).

You don’t even have to peel the apples. Just making sure you’re using organic, unwaxed apples. Of course, you can peel if you want to. I lack that patience and I like the lovely pink color the applesauce turns with the peels left on.

But really, it’s just chopping the apples and then cooking them down to your desired texture. It takes time, but not much in terms of labor or complication. If you want a really smooth applesauce, you can use an immersion blender (or a regular one). That adds one more step and tools to clean, but it’s still not hard.

Overhead shot of red apples in a glass bowl

Which apples should I use for applesauce?

Whatever kind of apples you love to eat! Yes, certain types will hold up better to cooking. In general, for cooked applications, you want firmer, less sweet varieties. But it really is up to you and what you like to eat. I used a mixture of Jonathan, Honeycrisp, and McIntosh. I find using a few different varieties yields a more complex, flavorful applesauce.

Here’s the full list of recommended saucing apples from my local orchard:

  • Pristine
  • Zestar
  • Ginger Gold
  • Blondee
  • Elstar
  • Swiss Gourmet
  • Cortland
  • Grimes Golden
  • Jonathan
  • Cox’s Orange Pippen
  • Rubinette
  • Pinova
  • Winter Banana
  • Idared
  • Suncrisp
  • Winesap
  • Snowsweet
  • Fuji
  • Gold Rush
  • Pink Lady
  • Golden Delicious
  • Melrose
  • Jonagold
  • Cameo

…As you can see, you have lots of choices.

Overhead shots of chopped apples for applesauce in a dutch oven

What methods can I use to make this healthy applesauce?

The two I can say for sure will work are stovetop and slow cooker, though the latter will take longer. I’m sure someone has figured out how to use an Instant Pot, but I haven’t personally tested that method.

I like the stovetop because I’m impatient. I use my enameled dutch oven, but a nonstick stock pot is also a good choice. I’d avoid stainless steel as the apples will cook for long enough that the metal might leach an odd flavor.

Half cooked applesauce with the bottom of a wooden spoon

How do I store this applesauce?

First things first, this recipe is not approved for canning. You can store in the fridge or freezer instead.

I like to store my applesauce in old canning jars, but any glass or BPA-free plastic container will work!

Overhead shot of two glass canning jars full of freshly made applesauce

How long will it last?

This healthy applesauce should keep at least a week in the fridge or two months in the freezer. In my experience, it’s kept a lot longer in the freezer. I just finished off my final jar from last year a month or so ago.

*Note if you want to freeze it in jars, make sure you leave enough headspace and don’t tighten the lid at first to give the applesauce room to expand. If using a jar with shoulders, be sure the level of the sauce is below where the shoulder curves inward.

A spoon digs into a white ramekin of healthy applesauce oatmeal

How can I use this healthy applesauce?

Anyway you would use regular applesauce! It’s great plain, especially as an afternoon snack for kids. I love it on oatmeal or with yogurt and granola for breakfast. It’s also wonderful warmed and served over vanilla ice cream. Tonight, we’ll be serving it alongside pork chops.

You can also bake with applesauce as a replacement for the fat in some recipes. Or make an applesauce-specific baked good, like applesauce bread or muffins!

So, how do I make the easiest healthy applesauce?

Yield: 2 quarts

Easiest Healthy Applesauce

Overheard shot of chopped apples on a black cutting board with a chef's knife and whole apples off to the side

This applesauce recipe is more a method than a recipe with strict ingredients and amounts. Below is what I made in the photos in this post, but feel free to scale ingredients up and down based on what you have/how much applesauce you want!

Prep Time 5 minutes
Cook Time 1 hour
Total Time 1 hour 5 minutes

Ingredients

  • 5 ½ lbs apples, cored and diced
  • ½ c apple cider
  • 1 tsp pumpkin pie spice (or blend of cinnamon, ginger, nutmeg, allspice, cloves to taste)

Instructions

  1. Wash and dry your apples, Then core and dice into half-inch chunks.
  2. Combine apples, cider, and spice in a large stockpot. Place on stove and bring to medium heat.
  3. Once you can hear the cider simmering, turn down medium-low.
  4. Cook, stirring occasionally, until desired consistency is achieved. I let mine go about 2 hours, but go for longer or for less time depending on how you like your applesauce.
  5. Turn off heat and allow to cool. When cool enough to handle, dish into storage containers.

Notes

As noted above, if you like a very smooth applesauce, you can peel your apples and then immersion blend them once they've finished cooking.

To make this applesauce in the slow cooker, combine ingredients as above and cook on low about 6 hours.

© Meaghan
Pen drawing of an onion, some lettuce leaves, some peppers, a radish, a tomato, carrots, and a head of broccoli in dark green ink

Pin it for later:

Pinterest pin containing images of apples chopped up on a cutting board and applesauce stirred by a wooden spoon. A green banner with white text reads, "The Easiest Healthy Applesauce Recipe" and a banner at the bottom reads, "meaghangrows.com"
Four small jars of peach pepper jam on a granite countertop with a red dish towel on the left side. Two jars are stacked vertically and two are lying on their sides

August 24, 2021 Preserving

How to Make Sweet and Spicy Peach Pepper Jam (Recipe)

This peach pepper jam is sweet, spicy, and a delicious party appetizer with cream cheese. Plus it’s a great way to use up some of your summer garden bounty!

Ripe peaches hanging from a tree branch – peach pepper jam

We’ve hit the point in the summer where we’re completely swimming in garden produce. It will seem like we’ve begun to make a dent in the basket of cherry tomatoes that lives on the kitchen island. And then each day’s harvest refills it and more.

In my search to use and preserve as much of my garden bounty as possible, I came across the idea for a sweet and spicy peach pepper jam from the people at Pomona’s Universal Pectin, and immediately my imagination was hooked. It uses up not one but two kinds of peppers. And it gave me an excuse to go peach picking at a nearby orchard.

I’m imagining this peach pepper jam poured over a brick of cream cheese as a party appetizer. Or brushed on grilled chicken for an al fresco dinner. Or the jar adorned with a nice label and gifted to friends and family.

It’s also a great contribution to one of my goals this year: master water bath canning, as a part of preserving the harvest. I’ve already made a strawberry rhubarb jam and next on the docket is many pints of pizza sauce from all the paste tomatoes I’ve been stuffing in the freezer over the last month or so.

As far as jam-making goes, this was a pretty simple process. Blanch, peel, and then puree the peaches in a blender. Simmer the diced peppers in vinegar before adding the peaches and sugar/pectin mixture. Allow to boil, then ladle into sterilized jars and process.

In little more than an hour, I had some of my Christmas gifts figured out!

Four small jars of peach pepper jam on a granite countertop with a red dish towel on the left side. Two jars are stacked vertically and two are lying on their sides

What does peach pepper jam taste like?

In a word, delicious. It’s sweet and summery, with just a hint of kick. The chile peppers give it such a complex flavor – so much more interesting and satisfying than a regular sweet jam.

Overhead shot of four peach halves on a white countertop – peach pepper jam

How do I use peach pepper jam?

I love it best on toast with some cream cheese – or, poured over a brick of cream cheese and served as a party appetizer with crostini. It’s also really excellent in a marinade or sauce for chicken or shrimp. Try thinning it with some water and brushed on chicken/shrimp skewers as you grill!

It also makes a great hostess or holiday gift!

Hand holds a peach above a white colander full of peaches, demonstrating how to cut an X on the bottom before blanching – peach pepper jam

How do I blanch a peach?

Bring a large pot of water to a boil. While waiting for the water to heat, use a paring knife to score an X in the bottom of each peach.

It doesn’t need to be deep, just enough to break the skin. Drop your peaches into the water, only a few at a time so it doesn’t stop boiling.

After about a minute (give it longer if your peaches are underripe), remove them from the boiling water and plunge into a bowl of ice water until cool.

After that, the skins should just slip off! Remove the skins, halve to remove the pit, and your peaches are ready to puree for the recipe.

Overhead shot of a white colander containing the ingredients for peach pepper jam: a red bell pepper, some jalapenos, and peaches

Can I make any tweaks to this recipe?

When it comes to canning, you need to be careful to follow the recipe. Mess with it too much, and you run the risk of making you and your loved ones very, very sick. You can’t change the amounts of anything (except dried spices in recipes that call for them).

But, as long you keep the quantities of the ingredients the same, you can change the varieties of peppers called for in this recipe.

Don’t want it spicy at all? Replace the jalapenos with more bell peppers. Like it really hot and spicy? Go for all jalapenos – or even hotter varieties.

Overhead shot of a dutch oven containing finely chopped peppers simmering in apple cider vinegar – peach pepper jam

What sort of peppers do I use?

Again, here’s your one shot to be creative with this recipe. If you can handle spicy, I bet the fruitiness of habaneros would go great here.

But really, any variety is good as long as you keep the amount the same. If you want just a hint of kick, I’d suggest sticking with the recipe as written – a mix of jalapenos and a red bell pepper.

Overhead shot of a large stockpot full of water with a canning rack and small glass jars – peach pepper jam

Can I can this recipe?

Yep! To can this recipe, you’ll need a water bath canner and associated parts. The recipe should yield 12 four ounce jars.

Overhead shot of a dutch oven containing peach pepper jam and a wooden spoon. To the left is a bowl of sugar and pectin, a set of measuring spoons, and a box of Pomona's Universal Pectin – peach pepper jam

What sort of pectin do I use?

I love Pomona’s Universal Pectin, and that’s what this recipe uses. Pomona’s uses calcium water in addition to pectin (it comes in the package when you buy it). The combo of the two means you can use way less sugar than with other pectins. 

Many jars of peach pepper jam on a red dish towel. One is on its side

Do I have to can this peach pepper jam recipe?

You don’t – you can easily store it in the refrigerator instead. In that case, feel free to experiment with the ingredients more. Don’t add the pectin or calcium water, and feel free to scale the sugar to taste.

Angle shot of a small jar of peach pepper jam with a jalapeno in the foreground and a red dish towel behind

So, how do I make peach pepper jam?

Yield: 12-4 oz jars/6 cups

Sweet and Spicy Peach Pepper Jam

Small jar of peach pepper jam sits on a granite countertop with a jalapeno in the foreground and a red dish towel to the side

This peach pepper jam is sweet, spicy, and a delicious party appetizer with cream cheese. Plus it’s a great way to use up some of your summer garden bounty!

Prep Time 1 hour
Cook Time 10 minutes
Total Time 1 hour 10 minutes

Ingredients

  • 3 ¼ lbs peaches (4 cups onces pureed)
  • ½ cup finely chopped bell pepper
  • ½ cup finely chopped jalapeno
  • ¾ cup apple cider vinegar (use a standard, store-bought version with 5% acidity)
  • 6 tsp calcium water (calcium powder included in the Pomona's Pectin package)
  • 1 ¼ cups white sugar
  • 4 ½ tsp Pomona's Pectin

Instructions

    For full instructions, head on over to Pomona’s website: Peach-Jalapeno Jam.

Notes

Unless you water bath can this recipe (following proper sterilization procedures), you'll need to store the jam in the refrigerator. For long-term storage, keep in the freezer.

Category: Preserving
Pen drawing of an onion, some lettuce leaves, some peppers, a radish, a tomato, carrots, and a head of broccoli in dark green ink
Pinterest pin of ripe peaches hanging from a tree branch and of small jars of peach pepper jam on a granite countertop. White text on a blue background reads, "Homemade Sweet and Spicy Peach Pepper Jam," "Water Bath Canning Recipe," and "meaghangrows.com"
Next Page »

Primary Sidebar

Hi!

Selfie of the author wearing a blue dress and a floppy sun hat

I’m Meaghan – I help millennials learn traditional skills that give them power over their food supply and consumption. Grow with me!

  • Instagram
  • Pinterest
  • YouTube

Footer

Stay Connected

  • Instagram
  • Pinterest
  • YouTube
  • Home
  • About
  • Blog
  • Contact

Search

meaghangrows

November 🦃 November 🦃
October 🎃 October 🎃
September 🍁 CJC 9/21/24 September 🍁

CJC 9/21/24
Load More... Follow on Instagram

Calendar

October 2025
M T W T F S S
 12345
6789101112
13141516171819
20212223242526
2728293031  
« Mar    

Copyright © 2025 Meaghan Grows on the Cookd Pro Theme